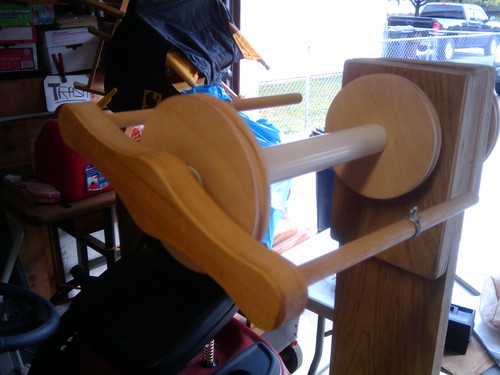
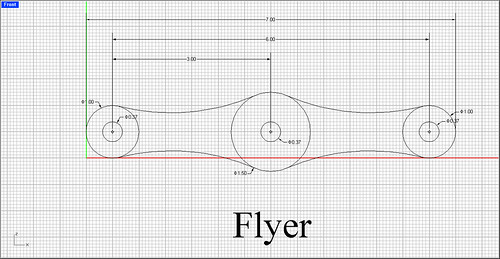
We made good progress on the spinning wheel yesterday, and even got it to the point of taking up some test string! In the photo below, you can see the flyer we constructed. It's made out of maple for strength instead of the birch plywood we used for the other parts. The arms are just dowels glued and hammered into holes in the flyer.
After this photo, I bent a piece of brass rod into shape for a delta flyer. Dad drilled some pilot holes and I hammered it home. It looks and works quite a bit like this Majacraft flyer, which was my inspiration. I didn't want to have to thread an orifice hole if I didn't have to.
I realized yesterday that while working with my dad on a project, we move through several "stages".
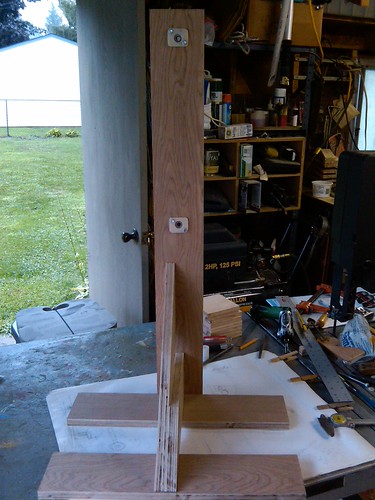
Stage 1: Data DumpThe inspiration that lifted our (my) spirits at the end of the day yesterday was to affix the treadle to the front side of the wheel instead of going under the wheel and attaching it from the back. [If you're facing the spinning wheel, the drive wheel is mounted on the backside of the upright.] This simplified several things about the design and also helped to balance the drive wheel. We also were able to jury rig a quick treadle assembly and I could see what the finished wheel will look like.
This is where my dad unloads all the ideas he's had whizzing around in his head since the last time we worked together. I basically sit there and try to sift through what he's describing to see if any of it is actually usable. He often comes up with 3 or 4 different ways to do something. This stage can take up to the first hour of our time together and by the end, I'm itching to get something done.
Stage 2: Get Movin'
We're finally done talking and ready to get down to business. We've decided what tasks we're going to tackle and actually start hauling out equipment, tools and materials.
Stage 2.5
Move everything back into the garage because it's going to rain.
Stage 3: The Lull
At this point, we've gotten a few tasks completed and have usually come across a speed bump in either design or fabrication. Dad wanders off into the bowels of the garage, his mind whirling with possible solutions. I begin to wonder who, in fact, is building this wheel. After a while, I realize that there are other things to work on and try to make myself useful. It's about this time that my Dad returns from his expedition with the initial problem solved.
Stage 4: Dismay
We may have solved a problem in the previous stage, but another setback can quickly lead to stage 4. It's also usually about this time that we start getting tired, likely dehydrated and definitely hungry. I don't want to work on the project any more that day and think we'll never get it done. My brain can't process what needs to be done or how to fix the problem we've encountered. Luckily, this stage mostly affects just me and not my Dad.
Stage 5: Hope
With my Dad pulling me through stage 4, we manage to plow through problems and make some tangible progress. Perhaps even, as happened yesterday, one of us is struck with inspiration that makes things a lot easier. I can see the light at the end of the tunnel and am excited again by the project. Unfortunately, this is also about the time I need to leave or am too tired to keep going.
For next time, to help move us through stages more quickly, I think I'll compile a list of what still needs to be done and come up with a plan of attack. Our disorganization is a big hindrance in moving forward with building this wheel. If I at least have an idea of what needs to be done in my head, I can keep my Dad on track too.


That said, it's a pretty sweet design, eh?