
Pattern: Van Ness Scarf
Yarn: Patons Classic Wool Merino
Hook: Boye 5.5 mm (I)
Started: December 2, 2009
Finished: December 6, 2009
Ravel It!
This blog may be named Knits With Balls, but lest we forget, I began my fibery career with crochet oh so long ago.
My MIL asked me for a scarf, oh about a year go now, and I finally got around to making it. She wasn't guilting me about it, but I felt guilty nonetheless. Especially since it was only one in the list of items I'm to make for her and others. I started to knit a broken rib pattern, but ran into three problems. 1) The two skeins of yarn I had were different dye lots, so I was alternating yarn every two rows which made it fiddly. 2) Knitting it was taking FOREVER. 3) It was REALLY BORING. Solution: Crochet.
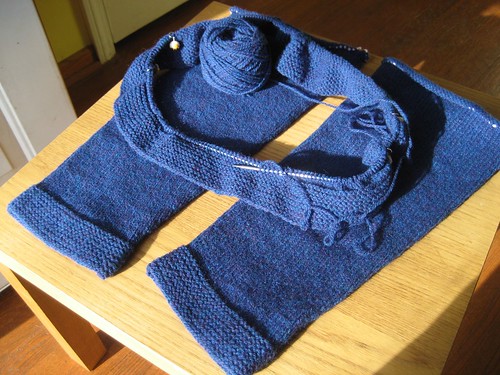
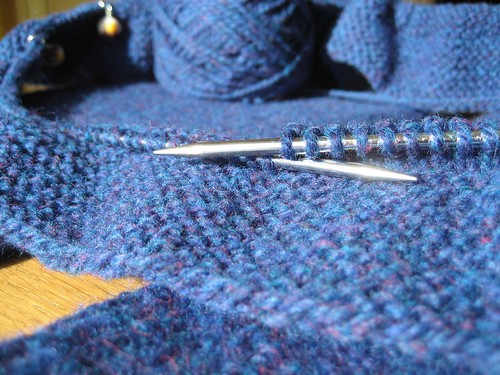
I searched Ravelry for crocheted scarf patterns and found what turned out to be the perfect pattern. The Van Ness Scarf was a bit fiddly to start (you begin in the middle of the scarf with four individually knitted crocheted medallions) but once I got going, it flew off the needles hook. I decided not to worry about the differing dye lots and knit each half with a separate skein. You can tell the difference if you look really closely, but she'll never know.
After much consternation regarding whether or not to gift it for Christmas - my wife, SIL and I usually give her gifts from all three of us, so an individual gift was outside the norm - I decided to last minute and I was glad I did. The holidays are crazy and stressful enough and - not to brag - I'm pretty sure I made her day. Her and her sister gushed over it, which still amazes me. I don't know if I'm humble or just cynical, but knowing what goes into making certain items - in this case, a mere 4 days of work - it surprises me when people react that way. Surprise or no though, it's still nice to have your work appreciated.
Tuesday, December 29, 2009
FO: Mother-In-Law Scarf
Monday, December 28, 2009
That Was Fun
Swift and ball winder from Jason Maynard on Vimeo.
Swift by my Dad. Ball winder by Lacis. Yarn by Cascade.Tuesday, November 17, 2009
Someone check the temperature
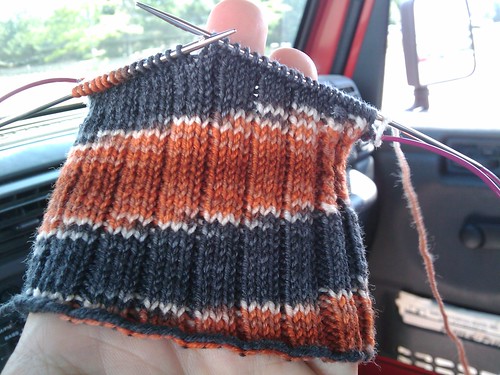
I think hell may have just frozen over. I'm blogging two days in a row. What I bring today is the first installment of Ram Club 3.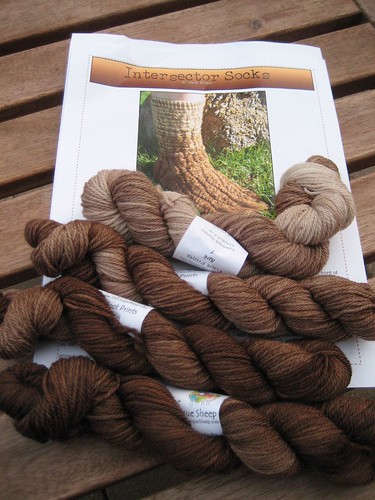
I think I signed up for this in July, so it was a nice surprise to see in the mail come October. Don't know when I'll get started on these, I'm really digging the Paraphernalia socks.
Monday, November 16, 2009
Still here...
Here's some proof. They are a bit longer now, but I'm having some back/shoulder issues which are keeping me from really going crazy with knitting. Which I would like to do. It's frustrating.
Wednesday, September 9, 2009
A quick vacation
In the spirit of timeliness, I'm forgoing a few FO posts to blog about more recent events.
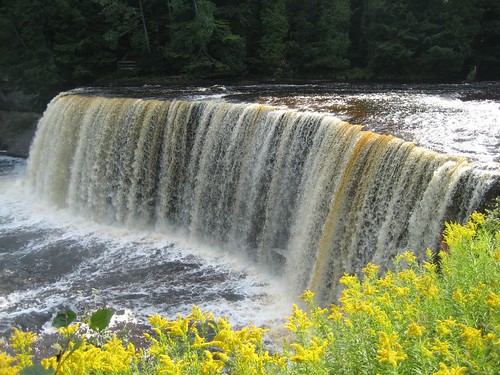
In a rather spur-of-the-moment decision, we spent Labor Day weekend up north at the grandparents' cottage near Kalkaska, MI. We brought our friends Phil and Maureen along and had a great time. The weather was awesome all weekend. On Saturday we drove up to Tahquamenon Falls and got some great photos.
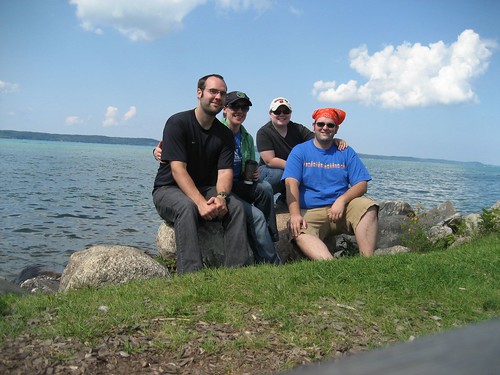
Sunday we drove into the tiny little town of Alden, MI just to show Phil and Mo Torch Lake, one of our favorite vacation destinations. Torch is one of the best lakes in the country. I forgot if it's 2nd, 3rd, 4th or whatever, but it is really, really beautiful. There are tons of $1,000,000+ homes on the lake and it's always jammed with people.
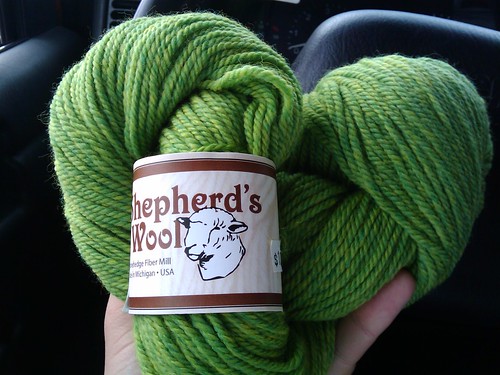
After visiting the lake we puttered around in the kitsch shops and I found some local yarn! Stonehedge Fiber Mill is located in East Jordan, MI, which was actually not very far from where we were staying. Unfortunately I didn't find that out until we got home, otherwise I would've visited. The yarn is surprisingly soft, but I wasn't too impressed with the color selection. Lots of bright solid colors, not many heathers. Although, after checking out their website, it looks like that was an issue with stock and not supply.
I also started two new socks on the drive up. My wife and I have a deal, she drives to where we're staying and I drive around once we get there. So, I got about 5 hours of knitting time. We left at 6:30 on Sunday, so it got dark halfway through our trip home.
These are simply 2x2 ribbing and they will be for my wife. She's been bugging me for another pair of socks and I thought this yarn would be perfect. It's Knitterly Things Vesper and it's only about 387 yards, perfect for little socks. I went with a 2x2 rib since the last pair of socks I knit in stockinette for her didn't both fit the same. She says one is tighter than the other.
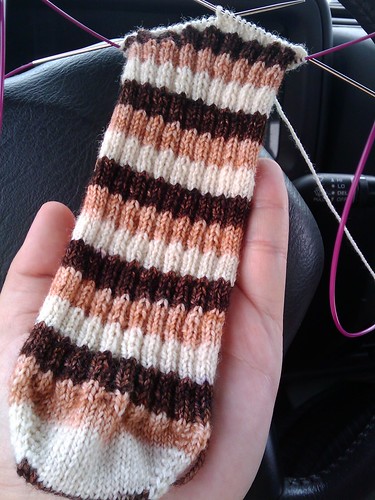
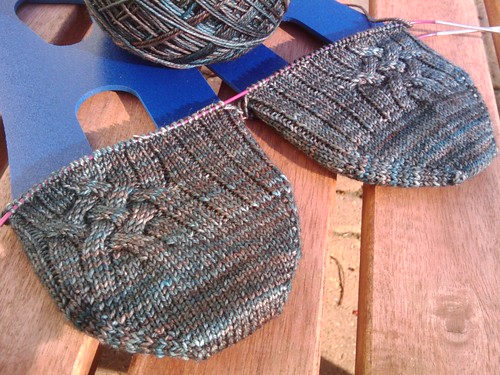
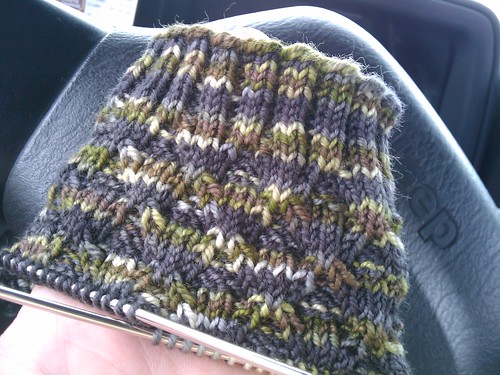
I also started a pair of Shur-tugal (no idea how to pronounce that) socks for myself. These are knit with Socks That Rock - Mediumweight, which I wanted to use to know whether I like it or not. I have some birthday money to spend and if I like it, I may get some more. I chose this pattern because I thought the heavier yarn and larger needles would counteract the pull of the cables, but now that I'm into it, I'm worried they'll be too big. I shall try them on tonight and find out. I like the cable pattern and I really like the special "double-tail" cast on. Check it out for yourself.
Monday, August 24, 2009
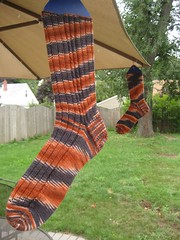
FO: Orange Pooled Socks
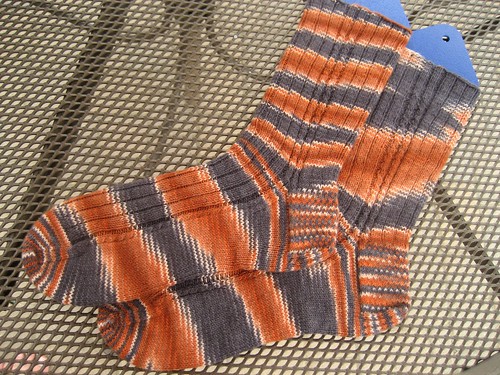
Pattern: my own
Yarn: handgefaerbt.com Merino Extra Fine in Little Zentaur
Needles: Knit Picks Options, size 1
Started: May 6, 2009
Finished: August 19, 2009
Ravel It!
Whew! Finally a finished project. I haven't had one of those since... **rifles through the archives** ...Well, I haven't had one of those blogged since... late April! At last count I have four (4!) unblogged finished projects. The addition of some sock blockers should alleviate that congestion.

Wednesday, August 19, 2009
Grafting the toe

Monday, August 3, 2009
A brief update
It was really nice to knit at lunch today. I needed it, it's been a hell of a Monday. This is the vacation sock I started back in May. The originally intended pattern didn't work out, so I switched to a much simpler one that's mostly 3x1 ribbing. I love the way it's pooling.
Monday, July 6, 2009
A little verse
For want of a sock blocker, an FO was lost.
For want of a FO, a photo was lost.
For want of a photo, a blog post was lost.
For want of a blog post, blog mojo was lost.
Thursday, May 28, 2009
Gauge issues
I just tried on my nearly finished Typhoon socks (pictured in the post below) and sadly realized why they're pooling differently. You see, I started the sock on the right with a large circular needle and magic loop months ago, and knit the sock on the left using DPNs over the past few weeks. Since the needles are the same size, I naively expected to get the same gauge. I guess that's one in the lesson column for a) not leaving projects half done for months and b) making sure to knit all parts of a project exactly the same way.
Monday, May 11, 2009
Socks Aplenty
I've pretty much given up on my Red Wings sweater for now. Construction difficulties combined with warmer weather have forced it to the hibernation pile. What I've really been working on lately is socks.
I finally finished by Beyond the Sea Socks (FO post forthcoming) and picked my Typhoon Socks off the WIP pile. I'm knitting them toe up from opposite ends of a large skein, and you can see how they're pooling differently. 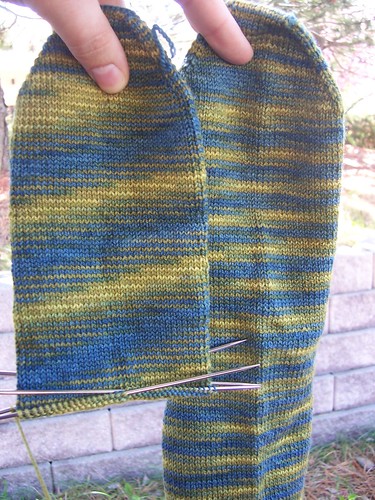
Typhoon Socks
I made lots of progress on these this weekend when I sat through a two hour graduation ceremony. I wanted to work on these since they are simple stockinette. I didn't take note before I started, but I probably did about two-thirds of what you see on the left sock.
I've been trying not to buy much yarn after the huge lot I purchased back in February, but WEBS' May sale made me fall down. I ended up with three skeins of Noro Kureyon Sock.
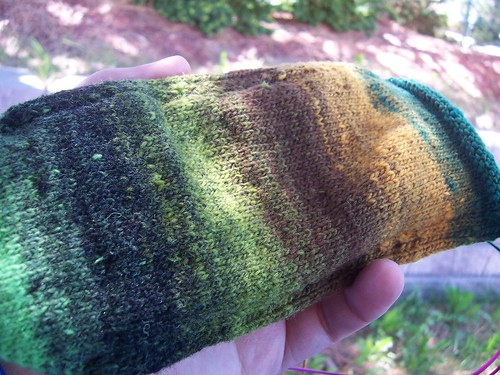
Noro Socks
I started these Thursday night and made most of this progress during the 2 1/2 hour drive to and from Mt. Pleasant. It's hard to tell in the photo, but I'm doing Stephanie Pearl-McPhee's Earl Grey pattern. I wanted some interesting knitting without requiring too much attention. I switched it to a toe-up pattern, so I can use every last inch of this beautiful yarn.
Finally, we have the socks I will be spending the most time with next week.

Vacation Socks
I started these only as far as the cuff because they will be my vacation socks. I didn't want to fiddle with starting socks on the plane, but I figured working the actual pattern before vacation would be cheating. The pattern is the Mad Color Weave socks, available here. They're pooling really crazily right now, I'm hoping it either continues like that or gets broken up by the pattern. I want to see how much knitting I get done, and also document the trip like the Yarn Harlot does.
Thursday, April 23, 2009
I'm a Fan of the Environment

Pattern: Swiffer Re-Usable Cloth
Author: Birdy Evans
Source: Birdy's Knits
Yarn: Lily Sugar'n Cream Ombres & Prints
Needles: Knit Picks Options, size 7
Started: April 10, 2009
Finished: April 11, 2009
Modifications: none
Ravel It!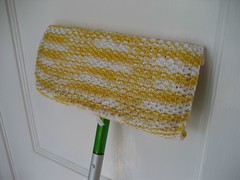 We go through a lot of Swiffer cloths in our house. In fact, my mother-in-law dropped off a giant box of them from Costco a few weeks ago. I finally decided that we needed a better solution.
I landed on this pattern because it was a) free, b) used needle sizes I had and c) is reversible. You can't see it in the pictures, but there are bobbles that you poke into the retaining tabs on the sweeper to hold it in place. You only need to push the bobble through to the other side and turn the whole piece inside out.
I gave it a quick push around (that's why it looks dirty in the photo - it is!) and it seemed to pick up the dust and dog hair nicely. I plan to knit several more of these and hopefully it can cut down on our waste.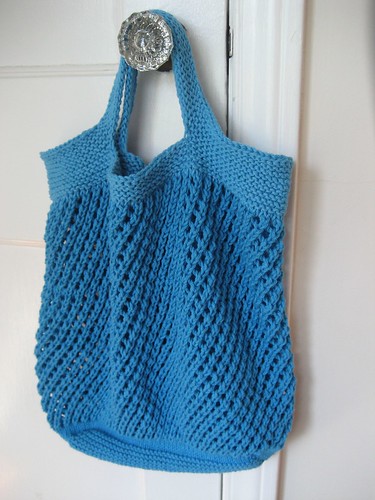
Pattern: Everlasting Bag Stopper
Author: Amy R Singer
Source: knitty.com
Yarn: Lily Sugar'n Cream Solid
Needles: Knit Picks Options, size 5 & 10.5
Started: April 11, 2009
Finished: April 18, 2009
Modifications: knitted handle, left off toggle
Ravel It!
Another shot at helping the environment, this bag took about a week to make. We already choose paper bags at the store whenever possible since they can be recycled and reused, but they also take up space in the kitchen and I hate putting them away. I thought a fun, totally reusable bag would make shopping more fun and environmentally friendly.
I originally thought two skeins would be enough, but as I knit I realized it would be way smaller than I wanted if I only used that much. I picked up a third skein at the store, but soon saw my mistake. The new yarn was a different dye lot and the difference was quite noticeable. I wanted to use as much of the three skeins as possible, but the dye lot difference meant a transition in the middle of the bag would not be pretty. So, I knit as far as I could on two skeins, then switched to the third for the garter top and handles. If you look closely at the photo, you can see the difference.
For the top and handles I knit 8 rounds (4 ridges) then bound off 20 stitches centered on either side. On the next round I cast on 35 stitches and reattached on the other side. I knit another 8 rounds or so and bound off loosely. The extra stitches cast on for the handles make them a little longer and easier to hold. Next time I may bind off more stitches to move the 'ends' of the handles closer to the short sides of the bag. That should also allow it to fit over a shoulder.
Unfortunately my first attempt to use my new shopping bag was met with resistance. I tried to use the self check out station at the grocery store and my approximately 180 gram cotton bag threw the scale off. It kept asking me to remove my last item and scan it again. To add insult to injury, I had to use plastic bags for that shopping trip since they don't supply paper at the self check stations.
These knits were my first foray into knitting with cotton yarn and it wasn't bad. I've read a lot of comments saying it hurt people's hands or wrists. My wrists did end up hurting after knitting the bag, but I don't know if that was from the cotton yarn or because I was doing a lot of knitting.
Wednesday, April 15, 2009
The collar didn't work
Stitched down the collar last night and made a sad realization. Knitting a collar straight around without decreasing makes for a stand-straight-up collar. Yeah. Back to the drawing board. I know I have to decrease, but how much? 10%? 25%? 30%? 50%? Any suggestions?
Tuesday, April 14, 2009
So it's been awhile...
According to Ravelry - the only site I can keep semi-up-to-date it seems - I've finished three WIPs, started two more and finished one of those since last we spoke. I also know I've made good progress on my Wings sweater. I just haven't had time to let you all know that. A busy work schedule in March combined with almost 2 weeks with practically no computer killed my blogging mojo. The upside was I had more knitting time.
I had planned on waiting until the collar was finished on this to show my progress - you know how progress photos are instantly obsolete - but with the weather we've had this week and the fact that I haven't actually finished it yet and that my camera crapped out and, and, and...here's a month old progress shot.
This is right after I finished the widest (tallest?) stripe where I will dup. stitch DETROIT across the chest. I've since finished knitting the body and only need to stitch the collar down. I hope to complete that tonight. After that I only need to reknit the sleeves and stitch the 'crest' on. Hopefully I can finish before the playoffs are over.
Wednesday, March 4, 2009
Sweet Christmas Present

So it's two months to the day late, but better than never right? I heard about this particular book on David Reidy's podcast, Sticks and String. Noting the current scarcity of Alice Starmore's book, this gem at around $20 was a steal. When mom asked if there was anything else I wanted for Christmas, I couldn't say the words fast enough. You can get the best look at the goodies inside on the Ravelry page for the book. I love that about Ravelry since you can't look inside most knitting books on Amazon.
Thursday, February 26, 2009
Tips 'n' Tricks: Logo Embroidery
As promised, I give you the brief tutorial on how I stitched the logo onto my Red Wings Winter Classic hat. What follows are instructions on how to use satin stitch to create a logo on a knitted garment. This is just How I Did It, not necessarily How It Should Be Done.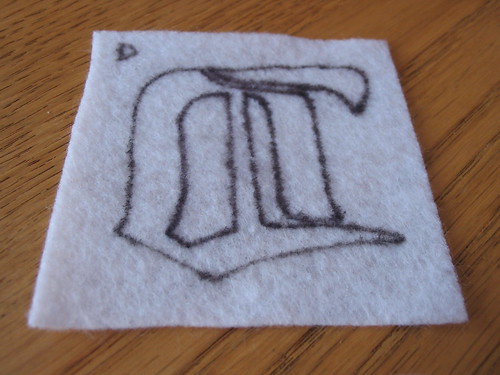
Once I found the logo I wanted to use, I printed it and cut it out. I then laid it face down on a piece of felt and traced around the entire outline. Your logo should look backwards when you're done. I used a felt tip pen and I ended up with badly stained fingers. The felt I had did not absorb the ink like I thought it would. Proceed with caution. (The little D in the corner was just a test of the pen on the felt)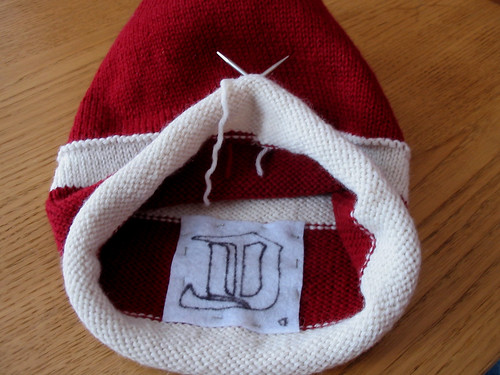
I then tacked the piece of felt to the inside of hat. Note that my hat is lined and upside down in the photo above. Be sure to orient/mount your felt piece properly. Obsession in this area is not taken lightly. I took a few pins and poked them straight through both pieces at key points to make sure I had the right position on the stripe of my hat.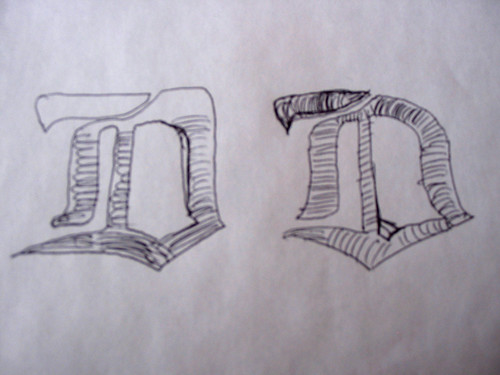
Before I started stitching, I wanted to think about how to orient the stitches around the logo. I knew that keeping the 'stitches' as short as possible was ideal. I also wanted to use only one length of yarn to fill in the spaces of the logo. (If you're working a larger piece, that may not be possible and you may have to divide and conquer. But then again, in that case, this technique may not be your best option.) My first attempt is on the left and you can see - in the second sketch - where I changed the orientation of the stitches at the bottom of the logo.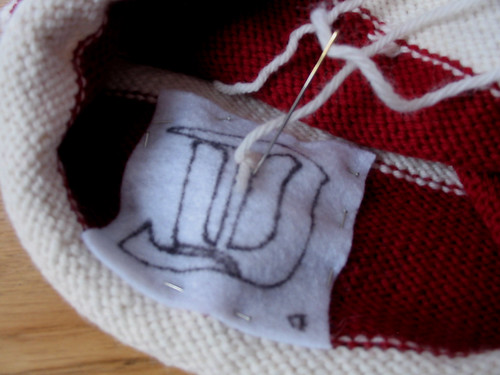
I decided to start with a small piece of the logo, the skinny bar running up the middle of the logo. I made sure I had good lighting and got to it. Don't try to thread enough yarn onto your needle for the whole logo. You'll end up having to walk across the room to pull it all through. Use about 3-5 feet of yarn at a time. Pull your needle and yarn through leaving a 2 inch tail. As you work your stitches, catch the tail on the backside to seal it in.
The trick to the technique is to make sure your needle goes vertically through both pieces of fabric and then pull through. Don't, don't, DON'T (did I emphasize that enough? Don't.) try to push the needle down and back up in one move like you would when sewing fabric. You'll end up with a badly puckered logo.
To get the right location on where to bring the needle back up, I used a combination of poking the needle through to line up with the lines drawn on the felt and 'eye-balling-it' from the front. I'll admit that throughout the process, I ended up sewing either inside or outside the lines a lot to matchup better on the front side. Remember, no one's going to see if you stayed within the lines on your felt backing, but everyone will see the right side of the logo.
Another tip is to ignore individual stitches in the knitted fabric. Instead, think of it as being a solid piece. Take the the photo below for example. There is about a one stitch width between the two embroidered lines, however, there's not a single continuous column of stitches separating them. There are actually two reasons for this. One, because I knit the hat in the round, my stitches slanted slightly to the left. It's a factor of how I knit and the yarn, but that's a different discussion. The other reason - and this would be a bigger issue if my stitch columns didn't slant - is because wrapping a bunch of yarn around a single column of stitches would inevitably pucker and leave gaps on either side. I made sure to be very exact with my stitch placement and definitely split stitches if necessary.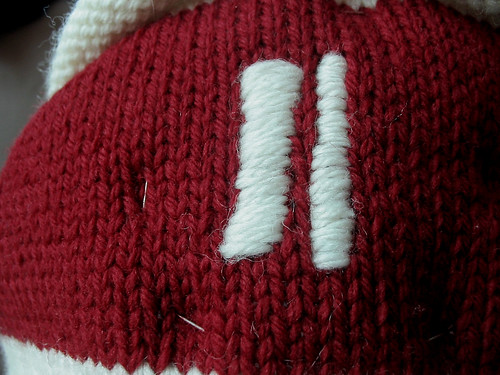
As you continue to work your way around the logo, you can remove the pins tacking the felt to the inside of the hat. At this point (above) you can see the first two (from left) vertical lines of the logo. If you look closely at what is the center line of the logo above, you can see the top half of it is not as wide as the bottom. If something like this happens, you can correct it in two ways. One, you could pick your stitches out individually. It's not as bad as it might seem, the felt backing helps as does a blunt needle. Just be patient. Your other option is to go back over your work with more stitches to better flesh out the design. I didn't actually do that in this spot (I didn't mind so much that vertical line) but I did in plenty of others.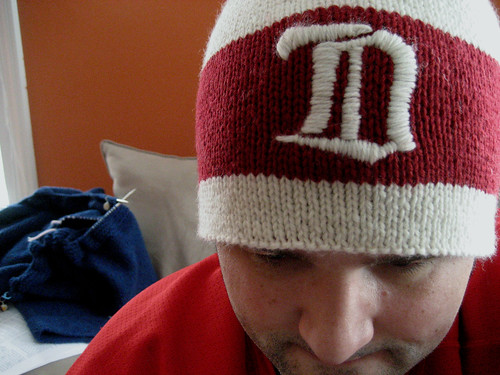
For the sharp point at the lower left of my logo I switched from tiny vertical stitches to a few sort of 'outline' stitches to bring it to a sharp point. Unfortunately the best thing I can suggest here is a bit of trial and error to see what works for you. The whole bottom line of the logo is where I stitched over a lot as described above to get the right shape.
Once you're done and your logo looks beautiful - and it will - just tack your loose ends down on the inside and finish up your hat.
Saturday, February 21, 2009
FO: Red Wings Winter Classic Hat
Pattern: Very Warm Hat
Author: Elizabeth Zimmerman
Source: The Opinionated Knitter
Yarn: Knit Picks' Wool of the Andes in Natural, Cascade 220 in Red
Needles: Knit Picks Options, size 5
Started: January 16, 2009
Finished: January 31, 2009
Modifications: none
Ravel It!
For the final goal of my January Hat Trick, I wanted to replicate the Red Wings version of the 2009 NHL Winter Classic hat. As soon as I saw the players skate out onto the ice wearing them, I knew I had to have one. I had one fortunate false start with this hat before I ripped it out. I say fortunate because after I frogged it, I rinsed/set the dye in the red yarn to avoid ending up with a pink hat. I'm glad I did because quite a bit of dye came out of the yarn. 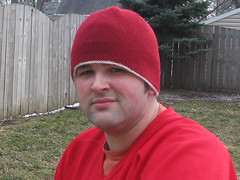 My first attempt had about a 4 inch lining in it to double up the material around my ears - I started the hat during the coldest point of winter thus far. I didn't like the way it sat on my head - you could see where the lining ended - so I decided to knit a fully lined hat. Of course, I turned to Elizabeth Zimmerman and her Very Warm Hat. I didn't want to use up any more of the natural yarn that absolutely necessary, so I knit the lining fully in red. The upshot is that the hat is completely reversible. I wasn't sure I would like the purled turn row (the original lining was just folded over) but it does form a nice edge between the two sides and I like how the white edging sets off the red side nicely on the reverse side.
It took several attempts to get the logo the way I wanted it and again, I'm so glad I stuck to my guns and did it right. I tried some practice, free-hand embroidery on the reverse side and was pleased with the result, but I knew I could do better. With the deadline for the knit-a-long fast approaching, I considered sewing on a felt patch. But after seeing how thin and flimsy the felt at JoAnn's was, I knew it wouldn't work. Not to mention the skinny parts of the logo would've been impossible to sew. The felt wasn't a complete waste though, as I used it for backing of the final logo. I believe the technique I employed is called satin stitch. It's basically filling in a shape or outline with lines of yarn sewn right next to each other. If you look at a store-bought, machine-knit cap, you can see a more refined version of this, and that's what I set out to duplicate. I'm cooking up another post that goes into further detail of the process.
The final verdict is absolute love, and quite possibly my best FO to date.
Wednesday, February 18, 2009
Random updates
Tuesday, February 10, 2009
How to Hide Yarn From Your Spouse in 7 Easy Steps

Bartlettyarns Fisherman 2-Ply, Natural
Step 1: Make enormous yarn purchase using personal bank account direct deduction through Paypal.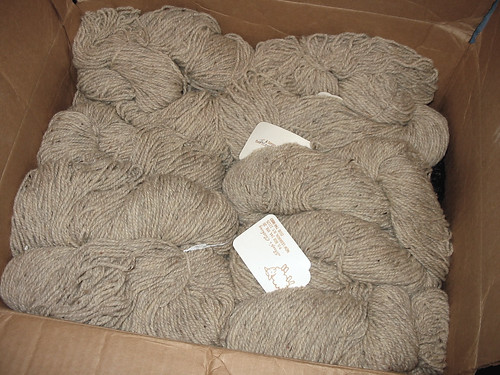
Bartlettyarns Fisherman 2-Ply, Oatmeal
Step 2: Have enormous yarn purchase delivered to work. Dodge questions from co-workers about contest of package.
Bartlettyarns Fisherman 2-Ply, Medium Sheeps Gray
Step 3: Plan to arrive home from work well in advance of spouse. Allow enough time to complete all steps as well as normal spousal duties like making dinner, so as not to arouse suspicion.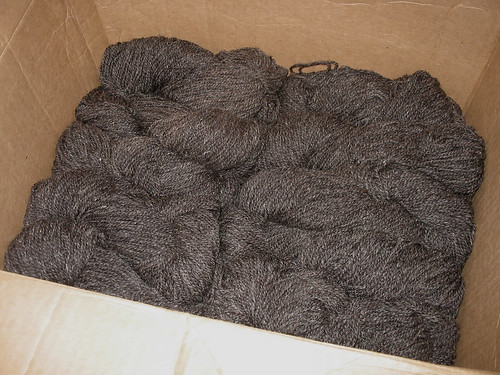
Bartlettyarns Fisherman 2-Ply, Dark Sheeps Gray
Step 4: Procure giant storage bag(s). Raid spouse's stash if necessary.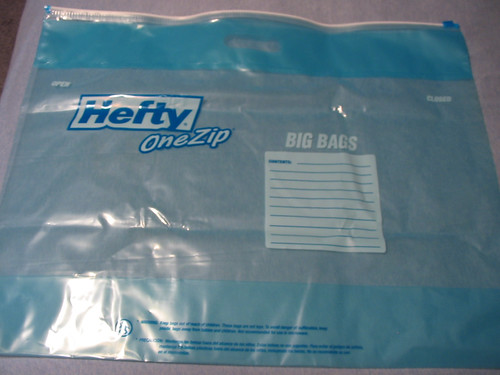
Step 5: Place yarn into giant storage bags, lay on top of to remove as much air as possible and store in rarely used bed drawer. Make sure bed drawer is on your side of the bed.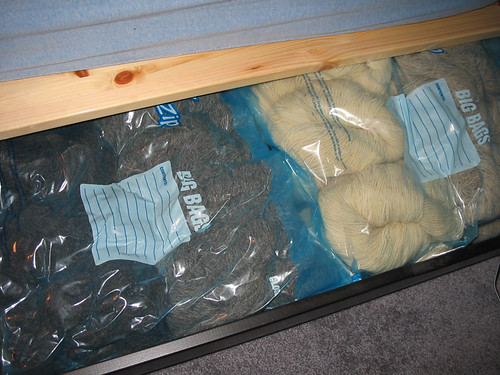
Step 6: (optional) Place laundry basket and other random bedroom object in front of rarely used bed drawer.
Step 7: Discard any and all incriminating shipping materials. Burn if necessary.
Unfortunately for me, I messed up on step 3 and my wife got home as I was in the middle of the process. I had one bag done and stupidly tried to hide the rest, tossing a sweatshirt over the box. She walked into the bedroom and said, "What's in the box?"
Damn.
All told, that's 40 skeins of Bartlettyarns Fisherman 2-Ply. 8,400 yards / 10 pounds / 4 sweaters worth (or more) of yarn. And I only paid $135 shipped. Can you say bargain?
Monday, January 26, 2009
FO: Yzerman Aran Hat
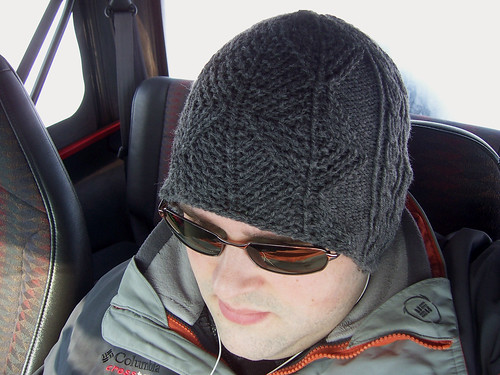
Pattern: Fishtrap Aran Hat (January)
Author: Elizabeth Zimmerman
Source: Knitter's Almanac
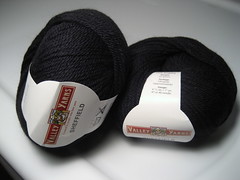
Yarn: Cascade 220 in charcoal
Needles: Knit Picks Options, size 7
Started: January 11, 2009
Finished: January 18, 2009
Modifications: none
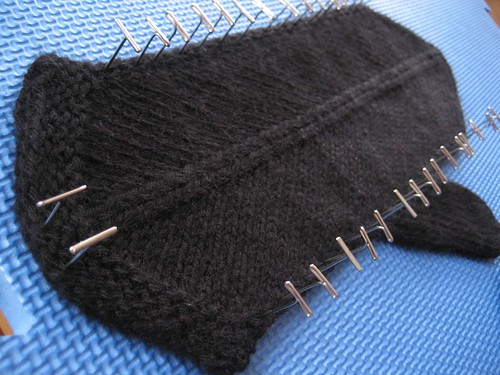
Ravel It!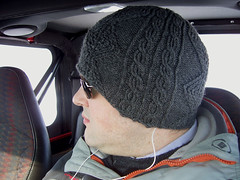 This is goal #4 in the January Hat Trick KAL. I plan to knit the Aran Cardigan from the January chapter of Knitter's Almanac, but I definitely wanted to practice the pattern first. The hat still needs to be blocked, but I love how it fits. I'm not sure if the fishtrap pattern pulled up or the ribbed cables at the sides pushed down, but the result is a very handy brim edge. The ribbed cables extend just enough to cover my ears comfortably while the front and back of the hat sit up a little higher, so it doesn't slip down to cover my eyes and it doesn't bunch up in the back. The cables at the side also give some extra thickness for even warmer ears.
Tuesday, January 20, 2009

Friday, January 16, 2009
Check Out My Big Ten Inch...

... sweater for a man that's knit in blue ...
Monday, January 12, 2009
FOs: 5-Hole Pocket Hat & One Good Turn Deserves Another
Hat Trick complete!
Pattern: 8-trick pocket hat
Author: TECHknitter
Source: TECHknitting
Yarn: Cascade 220 in burnt orange, marine, yellow, charcoal and red
Needles: Knit Picks Options, size 5 & 6
Started: January 2, 2009
Finished: January 7, 2009
Modifications: none
Ravel It!
I've been wanting to make this hat since seeing it on TECHknitter's blog last February. I knew I had enough Cascade 220 to make it work, I just needed the motivation of the January Hat Trick to get started. I was pretty surprised with how little of each color I used. The yarn was leftover from various projects and I still have enough for at least one, maybe two more hats. I knit the brim on size 6 needles, but decided to switch to size 5 for a bit tighter gauge for the body of the hat. I'm glad I did. The hat hugs my head nicely, not too tight and not too loose. The only part of the fit I don't like is the top. It really needs to be ripped out and made shorter for two reasons. One, with the brim positioned just below my ears, the top sticks up and looks goofy. I prefer a hat to fit snugly on the top of my head and to do so now bunches the hat in back. Two, the extra room up top allows the hat to shift around while I'm wearing it. We got 6+ inches of snow this weekend and I wore the hat while shoveling. I had to continually re-adjust the hat to keep it out of my eyes. Luckily, the pattern accounts for size adjustments all in the last 'stripe' at the top of the hat, so I won't have to redo the whole thing.
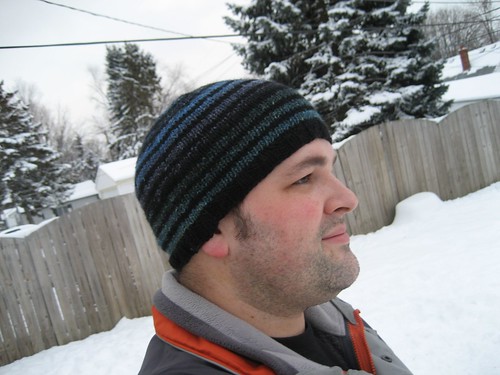
Pattern: Turn a Square
Author: Jared Flood
Source: b r o o k l y n t w e e d
Yarn: Knit Picks Wool of the Andes in black & Noro Silk Garden in 252
Needles: Knit Picks Options, size 7
Started: January 10, 2009
Finished: January 11, 2009
Modifications: knit two stitches between crown decreases
Ravel It!
To complete the hat trick, I took the easy way out.* My first Turn a Square went so quickly, I knew I could whip out another easily. I happened across some leftover Wool of the Andes in my stash this weekend and - after seeing how little yarn my first TaS took - thought it would be enough to make another hat. To better ensure I wouldn't run out though, I switched things up and knitted only 2 rounds in the main color and 3 rounds in the contrast color. I was right to do so, I only had a few yards of the black yarn left when finished. 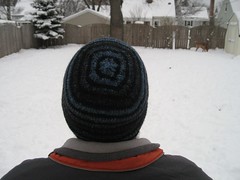 I had a bit of difficulty with the decreases on my first attempt at this pattern, so I decided to try something different. I knit two stitches between the decreases to try and eliminate the gaps that formed the first time. I'd say it was a success, but had one unexpected side effect. The normal raglan decreases form the titular square on top of the hat. Putting extra stitches between these in effect rounded the corners of that square. If I were to knit this pattern again - and I think I have just enough Silk Garden to do it - I would move the decreases so they lay in the middle of a needle rather than at the end to better close up the gaps.
All in all, the January Hat Trick was (and still is!) a lot of fun. I've really enjoyed seeing everyone else's hats and getting to know members of the Puck This! group on Ravelry better. Thanks to Lolly and Mesange for putting this together. I look forward to more great KALs with this group.
Finally, I leave you with an outtake from this weekend's hat photo session:

She was so fired up, she wouldn't sit still for a photo
*I've since cast on for the Aran Swatch Cap I originally queued to complete my hat trick. I fully intend to finish with 4 goals this month.
Wednesday, January 7, 2009
FO: Top Shelf Turn a Square
Pattern: Turn a Square
Author: Jared Flood
Source: b r o o k l y n t w e e d
Yarn: Cascade 220 & Noro Silk Garden
Needles: Knit Picks Options, size 6 & 7
Started: January 1, 2009
Finished: January 2, 2009
Modifications: none
Ravel It!
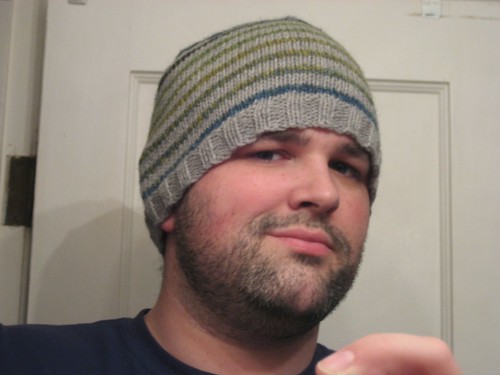
My first FO of the new year and boy did I get it in early! I cast on shortly after midnight passed on New Years Eve, knit all through the 2009 Winter Classic (Go Wings!) and finished just before 3 a.m. Hey, I was on a roll!
This is the first of at least three hats I plan to make this month as part of the January Hat Trick KAL in the Puck This! group on Ravelry. If you knit three hats, they're all put into a poll to be voted on by group members and the top vote getter wins a prize. I'm not in it for the prize, I'm sure my hats will be more on the boring/simple side, but so far it's been great fun to read all the chatter about hat patterns, yarns and goals.
I made sure to knit this pattern long enough to cover my ears. When I originally knit my orange Koolhaas, it covered my ears, but after weeks of wear, it seems to have shrunk up. It also needs to be washed and blocked again, so I wanted to have a replacement hat ready in case it doesn't dry in time.
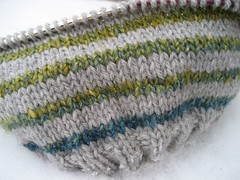 For some reason, the skein of Cascade 220 I used here is Really Soft. I don't find Cascade 220 to be scratchy by any means, but this particular skein was remarkable. Combined with the Noro Silk Garden, I ended up with a very cozy hat. I was a little unsure how the colors would stripe and work together, but I'm VERY happy with the result. I even have enough yarn left over for a second hat.
Monday, January 5, 2009
My Second First Sweater
After having knit several stockinette swatches with garter borders, I rather fell in love with the look. I laid in bed that night thinking, "Maybe I'll just knit a simple raglan sweater with garter borders. Oh, and I could even do a line of garter up the side for more interest." And then I realized what I was envisioning: Jared Flood's Cobblestone. Well then, aren't I a genius?
Next morning I cast on for a sleeve and was off to the races. The yarn is a bit stiff to work with, but I think I've gotten used to it. It definitely softens up after a good washing. The only troubles I've had so far are with the cable length on my circular needle (it's almost too short to knit the body comfortably) and knitting garter stitch in the round. It wasn't much of an issue with the sleeves, but switching from knit to purl and back at the end of the round on the body has created a weak spot where the fabric wants to fold. I'm hoping it will block out, but I'm planning to try the jogless garter stitch employed by Alice here for the yoke.
I'm now into the endless sea of stockinette that is the body of a man sized sweater. The garter panels at the side break things up enough to keep it interesting, but I don't really mind all the stockinette. I've been in the mood for something mindless for quite a while now.
Friday, January 2, 2009
FO: Mom's Mitered Mittens
Pattern: Mitered Mittens (May)
Author: Elizabeth Zimmerman
Source: Knitter's Almanac
Yarn: Valley Yarns Sheffield
Needles: Knit Picks Options, size 7
Started: December 2, 2008
Finished: December 9, 2008
Modifications: Same as last time
Ravel It!
My Mom requested a pair of these after seeing my own pair knit with Noro Silk Garden, so I decided to make them part of her Christmas present. She wanted them in all black, but as you all know, Noro doesn't come in solid colors. In searching for a replacement, I took the opportunity to try something new.
 I wanted a yarn with a high silk content, but also some wool for warmth. I settled on Sheffield by Vallen Yarns from WEBS. It was the worsted weight yarn with the highest silk content they offered, although it wasn't until I placed the order that I realized that NSG is mostly silk with some wool and mohair. Sheffield is essentially a merino yarn with some silk and angora. Dissimilarity to NSG aside, it's a really nice yarn. I don't know that I'd make a sweater out of it because of the angora (too fuzzy for me) but it would definitely be luxurious.


