I have never knit a garter stitch scarf. It would seem that every knitter has the story to tell of their first foray into the craft, only knowing one stitch and repeating it ad infinitum. For most, it's not looked upon fondly. I never had that experience. The whole reason I learned to knit was to produce stockinette.
The first fiber craft I learned was crochet. I crocheted probably 5 or 6 afghans (in acrylic no less, but that's a story for another time) before deciding I wanted to 1) make garments* and 2) create something with a smooth surface. I started noticing knit sweaters in stores and comparing them with the texture I was getting with crochet. The smoothness of little 'V's marching across the front of a sweater appealed to me.
I taught myself how to knit from instructions found on the internet. No one around me knew how to knit, so they couldn't coddle my mind by only teaching me the knit stitch and withholding the purl stitch until I was comfortable. I didn't know any better, so why not learn both at the same time? That's what I needed to know to make what I wanted anyway.
I still have my first test swatch. It actually does begin with a few rows of garter, but only because the instructions I had were less than great. If I remember correctly, I was knitting some version of twisted garter stitch, not understanding how the needle needed to go into each stitch to purl. But once I figured it out and saw those neat little 'V's stacking up, I was off and running. Bring on a pattern!
Now, don't misinterpret my ambition for skill. The first garment I ever attempted to knit was a hooded sweatshirt found on the back of the label of Bernat acrylic. It was blue variegated yarn and looked awful. Don't even get me started on seaming...I put the pieces together with sewing machine. It's since been frogged from embarrassment, but I'll never forget it.
I moved on to other projects, eventually discovered wool yarn, and created some nice items. However, it took me 6+ years to discover what a wonderful thing garter stitch can be. And I only have Elizabeth Zimmerman to thank. My first project to incorporate the simplest of patterns was the February Baby Sweater I completed earlier this year.
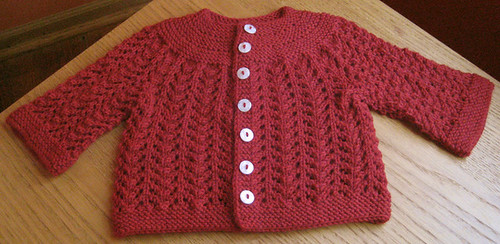
Pattern: February Baby Sweater by Elizabeth Zimmerman, Knitters Almanac
Yarn: Cascade 220 Superwash in Christmas Red
Needles: Knit Picks Options, size 7
Started: May 14 2008
Finished: May 23, 2008
Photographed: August 9, 2008
Modifications: Knitted sleeves in the round
Ravel it!
I love this sweater. I love how squishy the yoke and cuffs are. I can't wait to have a daughter or niece to give it to. The buttons are a shimmery mother of pearl, which adds just enough glitz to brighten the sweater up perfectly. I had originally intended to enter this into the Michigan State Fair, but my laziness got the better of me and I never submitted the paperwork.
Once bitten by the garter bug, it was hard to stop. EZ can be quite the enabler.
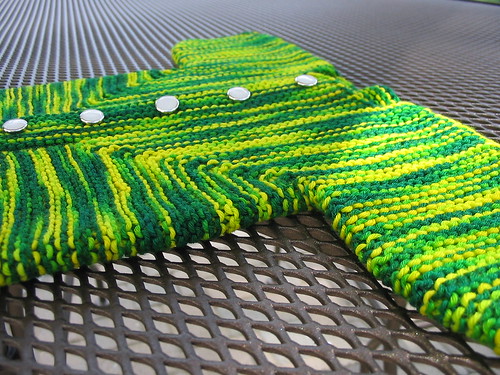
Pattern: Baby Surprise Jacket by Elizabeth Zimmerman, The Opinionated Knitter
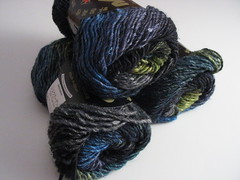
Yarn: Wollmeise Sockenwolle 100% superwash in Löwenzahn (Dandelion)
Needles: Knit Picks fixed circular, size 3
Started: June 2008
Finished: August 8, 2008
Photographed: August 8, 2008
Modifications: none
Ravel it!
Every so often as a knitter, you create something inspired. This was my first (hopefully of many). This will be the garment in which I bring home my first child.
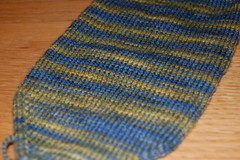
I was lucky enough to win the yarn from Becca at Forward Motion and get my first taste of wonderful Wollmeise. I absolutely loved the vivid colors - green and yellow are two favorites - but I wasn't sure I could pull off socks in those colors. I had wanted to try the BSJ in sock yarn since I saw Alice's tiny version at KathrynIvy.
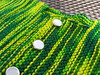 The end result is something so impossibly cute, my wife insists that I not leave it lying around lest she spontaneously combust. It's light, squishy and almost delicate - a perfect baby sweater. And I found the perfect buttons. Combined with the colors of the yarn, they remind me of a shiny, bright yellow jacket I had as a kid. I loved that jacket and I love this one.
One more random thought: The BSJ is constructed with only two seams running across the top of the shoulders. Take those out and you're left with one piece, albeit oddly shaped. I've contemplated taking the seam out once the baby outgrows the sweater and having it become that item a child latches onto for comfort. How cool would that be?
Having been fully indoctrinated into the world of garter stitch, I couldn't possibly keep all the squishiness to myself.
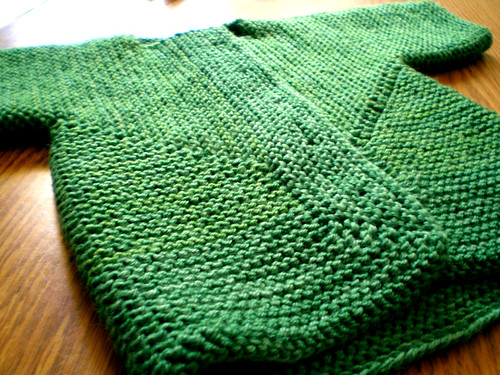
Pattern: Baby Surprise Jacket by Elizabeth Zimmerman, The Opinionated Knitter
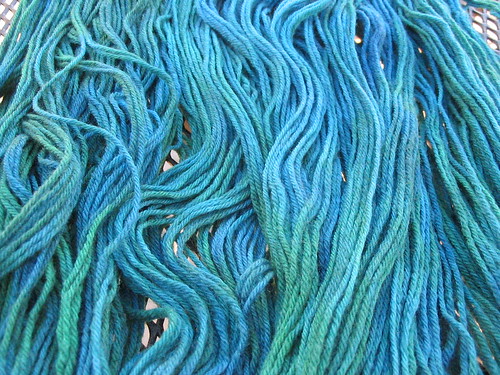
Yarn: Lornas Laces Shepherd Sock Solid in Pine
Needles: Knit Picks Options, size 5
Started: June 4, 2008
Finished: July 5, 2008
Photographed: July 5, 2008
Modifications: started neck opening one round before instructions
Ravel it!
My best friend had a little girl on June 12 and I definitely wanted to make something for her. With my wife currently doing tons of baby research, I know that most people like to give the cutesy tiny baby stuff that ends up only lasting the parents the first few months. Enter again the Baby Surprise Jacket.
Since Clara was born in June, this should be perfectly sized to fit her once cooler weather rolls in. I held two strands of Lornas Laces together to make the bigger size. I started the sweater with strands from two different dye lots, which created a nice jeweled look. Unfortunately, I ran out and had to finish with a single dyelot, doubling one skein. It worked out though, because the construction of the BSJ is very forgiving of stripes, ending up with a border of the different yarn.
Clara's Mom had requested something in Michigan State colors, but a green sweater with white buttons was the closest my Wolverine alliances would allow me to get. You don't see the buttons in the photos because I attached them on the way to deliver the gift.
So that's three garter stitch projects in about three months. And there are definitely more on the way. Next up are some modular pieces - a blanket and a vest - more baby items. Who knows where I'll end up, but I'll certainly get there with a new perspective on a timeless pattern.
*That's not to say you can't make garments with crochet. Those just weren't the type of projects I wanted to make.


