As promised, I give you the brief tutorial on how I stitched the logo onto my Red Wings Winter Classic hat. What follows are instructions on how to use satin stitch to create a logo on a knitted garment. This is just How I Did It, not necessarily How It Should Be Done.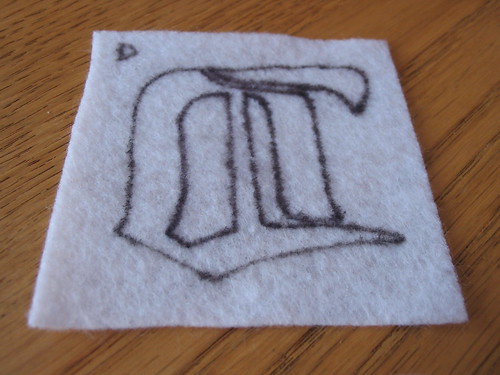
Once I found the logo I wanted to use, I printed it and cut it out. I then laid it face down on a piece of felt and traced around the entire outline. Your logo should look backwards when you're done. I used a felt tip pen and I ended up with badly stained fingers. The felt I had did not absorb the ink like I thought it would. Proceed with caution. (The little D in the corner was just a test of the pen on the felt)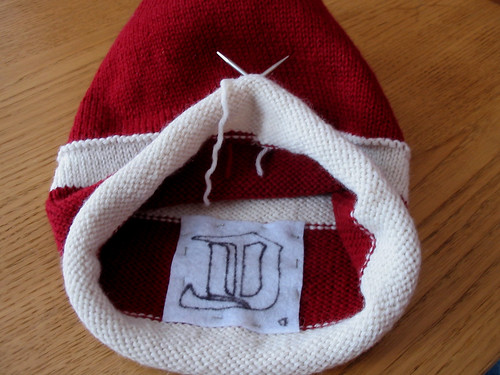
I then tacked the piece of felt to the inside of hat. Note that my hat is lined and upside down in the photo above. Be sure to orient/mount your felt piece properly. Obsession in this area is not taken lightly. I took a few pins and poked them straight through both pieces at key points to make sure I had the right position on the stripe of my hat.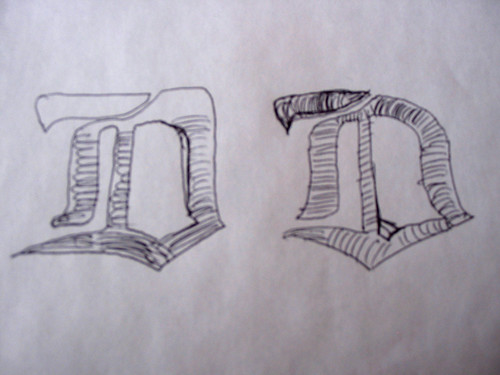
Before I started stitching, I wanted to think about how to orient the stitches around the logo. I knew that keeping the 'stitches' as short as possible was ideal. I also wanted to use only one length of yarn to fill in the spaces of the logo. (If you're working a larger piece, that may not be possible and you may have to divide and conquer. But then again, in that case, this technique may not be your best option.) My first attempt is on the left and you can see - in the second sketch - where I changed the orientation of the stitches at the bottom of the logo.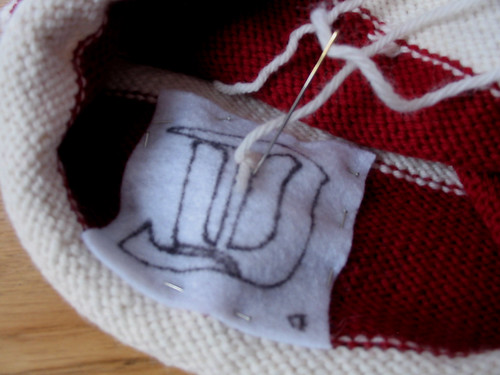
I decided to start with a small piece of the logo, the skinny bar running up the middle of the logo. I made sure I had good lighting and got to it. Don't try to thread enough yarn onto your needle for the whole logo. You'll end up having to walk across the room to pull it all through. Use about 3-5 feet of yarn at a time. Pull your needle and yarn through leaving a 2 inch tail. As you work your stitches, catch the tail on the backside to seal it in.
The trick to the technique is to make sure your needle goes vertically through both pieces of fabric and then pull through. Don't, don't, DON'T (did I emphasize that enough? Don't.) try to push the needle down and back up in one move like you would when sewing fabric. You'll end up with a badly puckered logo.
To get the right location on where to bring the needle back up, I used a combination of poking the needle through to line up with the lines drawn on the felt and 'eye-balling-it' from the front. I'll admit that throughout the process, I ended up sewing either inside or outside the lines a lot to matchup better on the front side. Remember, no one's going to see if you stayed within the lines on your felt backing, but everyone will see the right side of the logo.
Another tip is to ignore individual stitches in the knitted fabric. Instead, think of it as being a solid piece. Take the the photo below for example. There is about a one stitch width between the two embroidered lines, however, there's not a single continuous column of stitches separating them. There are actually two reasons for this. One, because I knit the hat in the round, my stitches slanted slightly to the left. It's a factor of how I knit and the yarn, but that's a different discussion. The other reason - and this would be a bigger issue if my stitch columns didn't slant - is because wrapping a bunch of yarn around a single column of stitches would inevitably pucker and leave gaps on either side. I made sure to be very exact with my stitch placement and definitely split stitches if necessary.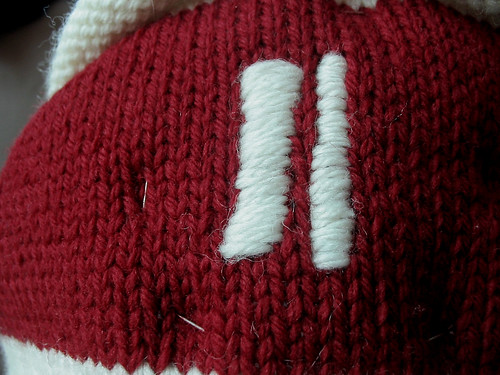
As you continue to work your way around the logo, you can remove the pins tacking the felt to the inside of the hat. At this point (above) you can see the first two (from left) vertical lines of the logo. If you look closely at what is the center line of the logo above, you can see the top half of it is not as wide as the bottom. If something like this happens, you can correct it in two ways. One, you could pick your stitches out individually. It's not as bad as it might seem, the felt backing helps as does a blunt needle. Just be patient. Your other option is to go back over your work with more stitches to better flesh out the design. I didn't actually do that in this spot (I didn't mind so much that vertical line) but I did in plenty of others.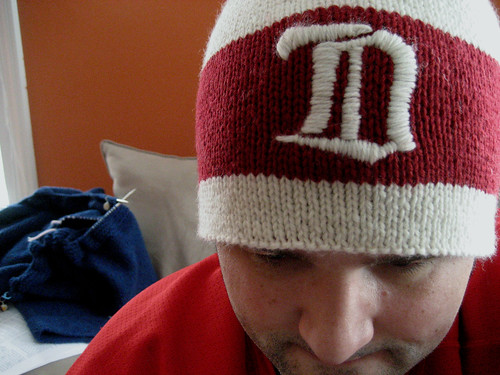
For the sharp point at the lower left of my logo I switched from tiny vertical stitches to a few sort of 'outline' stitches to bring it to a sharp point. Unfortunately the best thing I can suggest here is a bit of trial and error to see what works for you. The whole bottom line of the logo is where I stitched over a lot as described above to get the right shape.
Once you're done and your logo looks beautiful - and it will - just tack your loose ends down on the inside and finish up your hat.
Thursday, February 26, 2009
Tips 'n' Tricks: Logo Embroidery
Saturday, February 21, 2009
FO: Red Wings Winter Classic Hat
Pattern: Very Warm Hat
Author: Elizabeth Zimmerman
Source: The Opinionated Knitter
Yarn: Knit Picks' Wool of the Andes in Natural, Cascade 220 in Red
Needles: Knit Picks Options, size 5
Started: January 16, 2009
Finished: January 31, 2009
Modifications: none
Ravel It!
For the final goal of my January Hat Trick, I wanted to replicate the Red Wings version of the 2009 NHL Winter Classic hat. As soon as I saw the players skate out onto the ice wearing them, I knew I had to have one. I had one fortunate false start with this hat before I ripped it out. I say fortunate because after I frogged it, I rinsed/set the dye in the red yarn to avoid ending up with a pink hat. I'm glad I did because quite a bit of dye came out of the yarn. 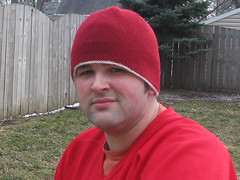 My first attempt had about a 4 inch lining in it to double up the material around my ears - I started the hat during the coldest point of winter thus far. I didn't like the way it sat on my head - you could see where the lining ended - so I decided to knit a fully lined hat. Of course, I turned to Elizabeth Zimmerman and her Very Warm Hat. I didn't want to use up any more of the natural yarn that absolutely necessary, so I knit the lining fully in red. The upshot is that the hat is completely reversible. I wasn't sure I would like the purled turn row (the original lining was just folded over) but it does form a nice edge between the two sides and I like how the white edging sets off the red side nicely on the reverse side.
It took several attempts to get the logo the way I wanted it and again, I'm so glad I stuck to my guns and did it right. I tried some practice, free-hand embroidery on the reverse side and was pleased with the result, but I knew I could do better. With the deadline for the knit-a-long fast approaching, I considered sewing on a felt patch. But after seeing how thin and flimsy the felt at JoAnn's was, I knew it wouldn't work. Not to mention the skinny parts of the logo would've been impossible to sew. The felt wasn't a complete waste though, as I used it for backing of the final logo. I believe the technique I employed is called satin stitch. It's basically filling in a shape or outline with lines of yarn sewn right next to each other. If you look at a store-bought, machine-knit cap, you can see a more refined version of this, and that's what I set out to duplicate. I'm cooking up another post that goes into further detail of the process.
The final verdict is absolute love, and quite possibly my best FO to date.
Wednesday, February 18, 2009
Random updates
Tuesday, February 10, 2009
How to Hide Yarn From Your Spouse in 7 Easy Steps

Bartlettyarns Fisherman 2-Ply, Natural
Step 1: Make enormous yarn purchase using personal bank account direct deduction through Paypal.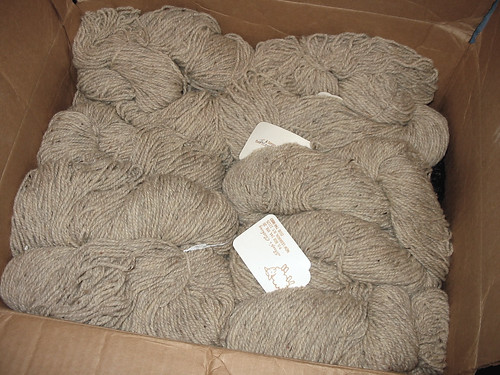
Bartlettyarns Fisherman 2-Ply, Oatmeal
Step 2: Have enormous yarn purchase delivered to work. Dodge questions from co-workers about contest of package.
Bartlettyarns Fisherman 2-Ply, Medium Sheeps Gray
Step 3: Plan to arrive home from work well in advance of spouse. Allow enough time to complete all steps as well as normal spousal duties like making dinner, so as not to arouse suspicion.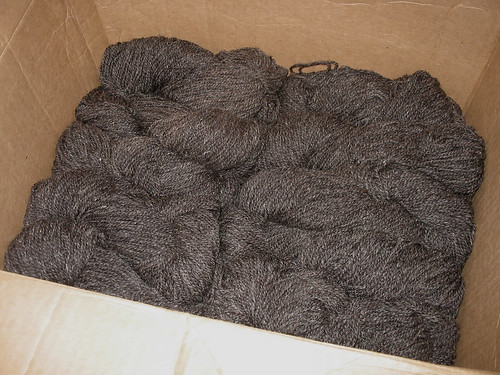
Bartlettyarns Fisherman 2-Ply, Dark Sheeps Gray
Step 4: Procure giant storage bag(s). Raid spouse's stash if necessary.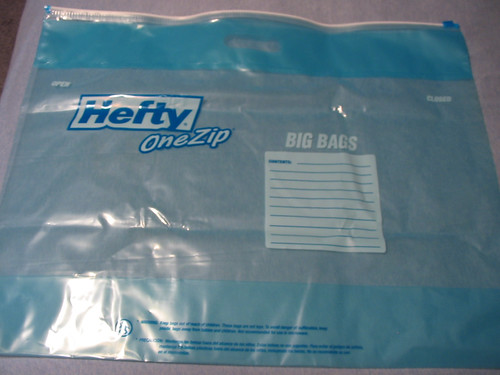
Step 5: Place yarn into giant storage bags, lay on top of to remove as much air as possible and store in rarely used bed drawer. Make sure bed drawer is on your side of the bed.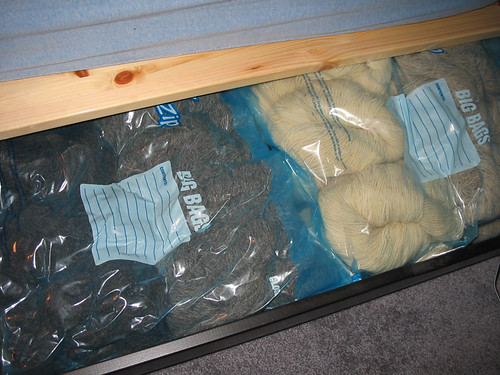
Step 6: (optional) Place laundry basket and other random bedroom object in front of rarely used bed drawer.
Step 7: Discard any and all incriminating shipping materials. Burn if necessary.
Unfortunately for me, I messed up on step 3 and my wife got home as I was in the middle of the process. I had one bag done and stupidly tried to hide the rest, tossing a sweatshirt over the box. She walked into the bedroom and said, "What's in the box?"
Damn.
All told, that's 40 skeins of Bartlettyarns Fisherman 2-Ply. 8,400 yards / 10 pounds / 4 sweaters worth (or more) of yarn. And I only paid $135 shipped. Can you say bargain?


