As promised, I give you the brief tutorial on how I stitched the logo onto my Red Wings Winter Classic hat. What follows are instructions on how to use satin stitch to create a logo on a knitted garment. This is just How I Did It, not necessarily How It Should Be Done.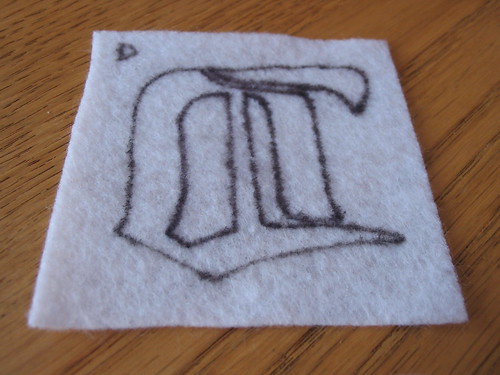
Once I found the logo I wanted to use, I printed it and cut it out. I then laid it face down on a piece of felt and traced around the entire outline. Your logo should look backwards when you're done. I used a felt tip pen and I ended up with badly stained fingers. The felt I had did not absorb the ink like I thought it would. Proceed with caution. (The little D in the corner was just a test of the pen on the felt)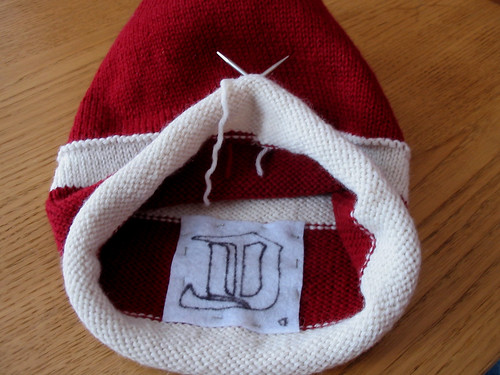
I then tacked the piece of felt to the inside of hat. Note that my hat is lined and upside down in the photo above. Be sure to orient/mount your felt piece properly. Obsession in this area is not taken lightly. I took a few pins and poked them straight through both pieces at key points to make sure I had the right position on the stripe of my hat.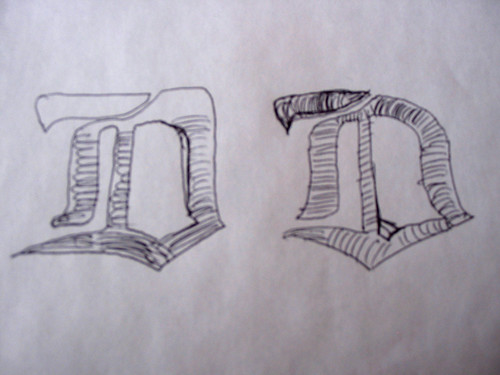
Before I started stitching, I wanted to think about how to orient the stitches around the logo. I knew that keeping the 'stitches' as short as possible was ideal. I also wanted to use only one length of yarn to fill in the spaces of the logo. (If you're working a larger piece, that may not be possible and you may have to divide and conquer. But then again, in that case, this technique may not be your best option.) My first attempt is on the left and you can see - in the second sketch - where I changed the orientation of the stitches at the bottom of the logo.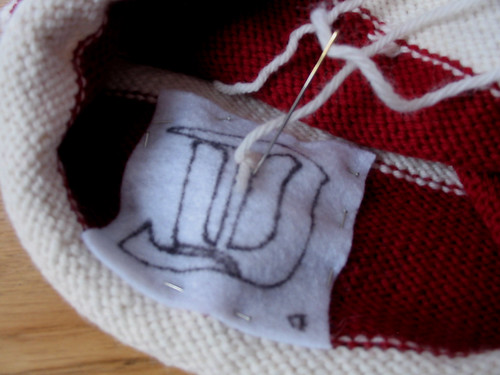
I decided to start with a small piece of the logo, the skinny bar running up the middle of the logo. I made sure I had good lighting and got to it. Don't try to thread enough yarn onto your needle for the whole logo. You'll end up having to walk across the room to pull it all through. Use about 3-5 feet of yarn at a time. Pull your needle and yarn through leaving a 2 inch tail. As you work your stitches, catch the tail on the backside to seal it in.
The trick to the technique is to make sure your needle goes vertically through both pieces of fabric and then pull through. Don't, don't, DON'T (did I emphasize that enough? Don't.) try to push the needle down and back up in one move like you would when sewing fabric. You'll end up with a badly puckered logo.
To get the right location on where to bring the needle back up, I used a combination of poking the needle through to line up with the lines drawn on the felt and 'eye-balling-it' from the front. I'll admit that throughout the process, I ended up sewing either inside or outside the lines a lot to matchup better on the front side. Remember, no one's going to see if you stayed within the lines on your felt backing, but everyone will see the right side of the logo.
Another tip is to ignore individual stitches in the knitted fabric. Instead, think of it as being a solid piece. Take the the photo below for example. There is about a one stitch width between the two embroidered lines, however, there's not a single continuous column of stitches separating them. There are actually two reasons for this. One, because I knit the hat in the round, my stitches slanted slightly to the left. It's a factor of how I knit and the yarn, but that's a different discussion. The other reason - and this would be a bigger issue if my stitch columns didn't slant - is because wrapping a bunch of yarn around a single column of stitches would inevitably pucker and leave gaps on either side. I made sure to be very exact with my stitch placement and definitely split stitches if necessary.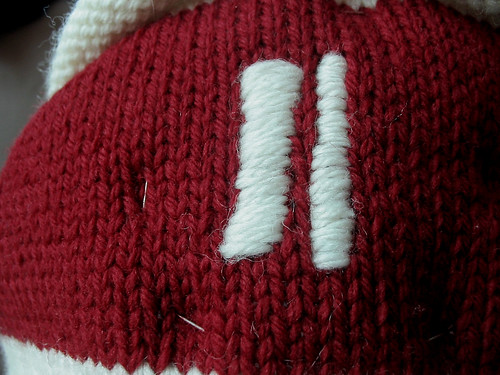
As you continue to work your way around the logo, you can remove the pins tacking the felt to the inside of the hat. At this point (above) you can see the first two (from left) vertical lines of the logo. If you look closely at what is the center line of the logo above, you can see the top half of it is not as wide as the bottom. If something like this happens, you can correct it in two ways. One, you could pick your stitches out individually. It's not as bad as it might seem, the felt backing helps as does a blunt needle. Just be patient. Your other option is to go back over your work with more stitches to better flesh out the design. I didn't actually do that in this spot (I didn't mind so much that vertical line) but I did in plenty of others.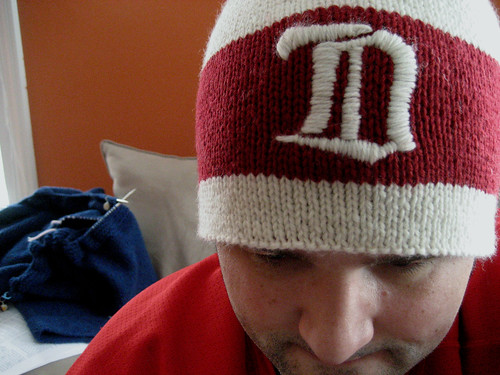
For the sharp point at the lower left of my logo I switched from tiny vertical stitches to a few sort of 'outline' stitches to bring it to a sharp point. Unfortunately the best thing I can suggest here is a bit of trial and error to see what works for you. The whole bottom line of the logo is where I stitched over a lot as described above to get the right shape.
Once you're done and your logo looks beautiful - and it will - just tack your loose ends down on the inside and finish up your hat.
Thursday, February 26, 2009
Tips 'n' Tricks: Logo Embroidery
Subscribe to:
Post Comments (Atom)


4 comments:
wow. you did a really nice job. i like your hat.
I am going to attempt to make this for my husband..wish me luck lol
I'm going ot attempt ot make this for my boyfriend - this is AWESOME (and a VERY welcomed alternative to the previous plan of attempting to knit on some sort of redwing logo!)
Thanks KWB!
GREAT tutorial! We are going to the 2014 Winter Classic and Alumni Games, and I am planning on crocheting red wings hats for my family who's going!
Post a Comment