First BSJ I ever knit, years before we even started trying to have kids. Got machine washed (ok), with velcro bibs (not ok). Worn maybe twice, now it's pretty much too small for him. :(

Cotton sunhat knit in the span of three days while we were up north after realizing his current hat didn't fit anymore. Fits him perfectly right now and it worked to keep the sun out of his face, dubious look aside.

Little Sophisticate shawl collared cardigan. I sewed the buttons on this weekend when it got chilly and I remembered that I knit this. It fits him great right now, though the sleeves are long, so he should be able to wear it a few times this fall.
*The wilds of our living room that is.
Showing posts with label FO. Show all posts
Showing posts with label FO. Show all posts
Tuesday, September 6, 2011
Knits in the Wild*

Wednesday, May 4, 2011
For Mojo

C'mon Red Wings. Let's do this.
This is what we brought E home in (over a month ago!). I knit it in about a week. It's a top-down raglan sweater with no shaping whatsoever, therefore the front of the collar sits a bit high. I did insert a placket on the left shoulder to make it easier to get on. I then sewed two or three snaps in to close it. I had initially intended to put buttons on, but snaps are SO much easier to manage on a squirming baby. And boy does he squirm.
I knit the logo across the chest as I went after I initially planned to use duplicate stitch. If I recall correctly, I was feeling pressed for time and thought this would be faster. I'm glad I did it this way, I think it looks better. To manage it in the round, I cut long lengths of the white yarn and started the first row in the middle of that length of yarn. I then had approximately the same length left waiting for me when I came around for the next row. Lather, rinse, repeat.
It ended up being a tad long, but hopefully that means he can wear it again when hockey resumes this fall. He's little guy, but he's also gaining weight quickly. If he outgrows it, I'll be knitting another one.
Wednesday, April 27, 2011
For the Birds

I'm exhausted from lack of sleep, so I'm not feeling terribly creative with the words today. I was able to knock this guy out over the weekend though. Which may have started an obsession with knitting all of the Angry Birds patterns and amigurumi in general. I envision live action Angry Birds. Unfortunately, with my self-imposed embargo on yarn purchases for 2011, I'm going to have to scavenge for the proper colored acrylic yarn.
One last things before I collapse into a coma at my desk: This little guy is weighted down with a custom made bean bag. Those are real beans in there.

If you're interested in materials, the fabric was left over from our bedroom curtains and is stitched together with an oddment of *gasp* Wollmeise. The beans are red. I may have overestimated the weight as the bird acts like a freaking Weeble. I fear for anyone that crosses its angry flight path.
P.S. If anyone has any Red Heart yarn they're looking to get rid of, I could use some in the following colors: Bright Yellow #0324, Spring Green #672, Delft Blue #0885
Friday, October 29, 2010
FO: Persian Paraphernalia

Pattern: Paraphernalia by Taina Anttila
Yarn: Malabrigo Sock in Persia #852
Needle: Knit Picks fixed circular, size 1
Started: October 31, 2009
Finished: May 8, 2010
Mods: Simplified cable pattern after foot
Ravel It!
I'm actually wearing these socks today, so I thought I would finally blog about them. I finished them way back in the spring, but they sat around waiting to be blocked and photographed while I worked on more socks. They finally got their first outing last week.
I started these socks almost a year ago, on Halloween last year. We were driving my brand spanking new Jeep back from Austin, TX. The yarn is Malabrigo Sock which I received in a Puck This! swap from Judy. I love the color. It's a dark yarn with enough variation to keep things interesting. As you can see, there was no pooling, which is a plus in my book.
I can't remember how I discovered the pattern, but I was in love with it as soon as I did. Unfortunately, I had to make some modifications to the cables, as they barely fit over my heel. At first I thought I could just remove the intertwined cable pattern from the gusset area - it stretched really badly - but I ended up having to adjust the pattern all the way up the leg. You can read more about my attempt to fix the gusset here, which actually worked, I just had to rip back after installing another tangled cable after the fix.
Thank you so much to everyone who offered congratulations on my previous post. We're very excited, scared, nervous, happy, etc. I'll be cranking out baby knits as much as possible, but there's quite a bit of work on the house - and other things - still left to do in the remaining 6 months. I may be able to get stuff knit, but I'm not too sure I'll get them blogged. As you know, my consistency is a bit lacking.
Thursday, July 29, 2010
FO: The Most Intricate Socks in the World

Pattern: Ornette by Cookie A.
Yarn: Wollmeise 100% Merino Superwash in Kornblume
Needle: Knit Picks fixed circular, size 1
Started: May 10, 2010
Finished: June 17, 2010
Mods: none
Ravel It!
I started this pair of socks back while the NHL Playoffs were still going on. I almost managed to finish them before they ended. They were a welcome distraction while my team was still in it, and something to keep me busy while I watched the remaining rounds.
I came by this pattern in an unconventional way. In the process of buying the pattern for a swap last summer, I accidentally bought two copies. Now, since it was only a digital copy, I could have just kept a copy for myself. But since I made the mistake I did, I was luckily not faced with that temptation.

This pattern is definitely not one you can work without paying close attention, although after awhile, it does become easier as you learn to read your knitting to know what to do next. I would say knowing how to work cables without a cable needle is essential to knitting these socks. There are so many (and on every row!) that using an additional needle would really slow things down. Luckily, the cables in the ribbing are only mock cables. I did have trouble with dropped stitches a few times, and let me tell you, you do not want to have to tink these socks if at all possible.
All in all, I loved knitting this pattern. The complexity was great for a distraction and it's a really beautiful design. The yarn really makes the cables pop and was nice to work with. It's not the softest yarn in the world, but the color saturation and structure really make up for it. My only regret is knitting these socks during the summer, because I'll have to wait months to wear them!
Friday, July 23, 2010
FO: Upstream Firefighters

Pattern: Upstream Master Pattern by Cat Bordhi
Yarn: Knit Picks Felici in Firefighter
Needle: Knit Picks fixed circular, size 1
Started: June 21, 2010
Finished: July 17, 2010
Mods: none
Ravel It!
I haven't blogged a finished knit since *gasp* March! Well, what a way to get back into the swing of things. I started these socks in advance of our summer vacation at the end of June. I only intended to get them started so I wouldn't have to cast on in the car, but I ended up almost to the heel turn before we left! I couldn't help it, the yarn and the pattern - simple stockinette foot with a 3x1 ribbed leg - made it quick work. I finished the first sock two days into our week-long vacation, but I couldn't cast on for the second as I chronicled here. Once we returned home and I gave up on the other sock I had started, it took me a mere 10 days to finish up the pair.
I've knit with Felici before and it worked up as I remember. With the way the color changes stripe so quickly and regularly, the knitting was hard to put down; I always wanted to get to the next color. The other pair of socks I knit with this yarn have held up pretty well, so I'm confident these will as well. If I had to pick one thing I didn't like about the yarn, it would be that the gray sections of yarn were tinged with red. I don't know if that's some of the dye wearing off or just red fibers spreading over the rest of the yarn, but it's not noticeable enough to matter.
This was my first time using Cat Bordhi's Upstream Master Pattern. I have used her Riverbed pattern though, which is the same construction except the increases are on the bottom of the foot. I really liked the idea of knitting a different pattern between the increases than was on the foot. It didn't really turn out to be as striking as I thought it would, but I still like it. The Upstream pattern (and Riverbed too) fits my foot really well, so I'll definitely use it again in the future.
You'll notice in the photo that this pair does not match exactly. I wanted to use as much of the yarn as possible (hence the toe-up pattern) and both skeins of yarn didn't start in the exact same spot in the color sequence. The only 'mod' I made with the stripe sequence was to take out a length of yarn before resuming the leg on the second (right) sock. You can see the very top of the heel flap is black; if I had kept knitting, I would have ended up with about one row of black stitches in the middle of the large field of gray right at the ankle. Since there was no pattern to speak of other than ribbing on the leg, I just knit until I was almost out of yarn before casting off. I ended up with less than a yard left over.
Thursday, March 18, 2010
FO: January KAL cloth

Pattern: January KAL cloth
Source: Kris Knits
Yarn: Lily Sugar'n Cream Solid - Cornflower (I think)
Needle: Knit Picks fixed circular, size 3
Started: January 7, 2010
Finished: March 3, 2010
Mods: Knit the border in garter stitch instead of seed stitch
Ravel It!
When I saw the idea for a monthly Knit-a-long on Kris' blog, I signed up instantly. I've been following her blogging for quite a while now, and had been itching to knit one of her designs. Since these were going to be free - and I'm a cheapskate - it was a perfect solution.
The catch for this KAL is that it's a mystery. Kris posts 10 lines of the pattern every few days, so we all get to have fun knitting and figuring out what the design will look like. I figured this one out pretty quickly; it helps that they have a theme that relates to the month.
I actually knit the pattern halfway in a different color yarn, some scraps leftover from a grocery bag. When I ran out, I went to the store for more yarn... only I couldn't find a matching dye lot. No matter, just buy more yarn! The first color was a more electric blue, so I think the cornflower works a lot better. It took me two months to knit this for several reasons. One, Kris was in the middle of moving and was therefore unable to post pattern updates regularly. Two, I went on vacation mid-February and took a different project to knit. Three, when I knew I needed more yarn, I wanted to wait until the February pattern was posted so I could buy yarn for that at the same time. Finally, after the Ravelympics, I vowed to not knit on a deadline for awhile; so I took my time.
I only made one mod with this pattern, and that was to knit the border in garter stitch instead of seed stitch. My seed stitch in cotton yarn looks like crap, plus all the switching between knit and purl wreaks even more havoc on my wrists. And I just like the way garter stitch looks. Consequently, the side border blends right in with the design itself. I'm not sure if those are supposed to be trees or piles of snow on the sides, but oh well, I like how it looks.
At the end of the year I'll have 12 dishcloths knitted up. I think I'll give some as Christmas gifts. Or maybe gift the whole set to my mom. She'd like that.
P.S. I installed a new comments system, Disqus, that will hopefully allow me to respond better to comments. Won't you test it out for me?
Wednesday, March 17, 2010
Happy St. Patrick's Day

Pattern: The St. Patrick's Day Cloth
Source: Kris Knits
Yarn: Lily Sugar'n Cream Solid - Sage Green
Needle: Knit Picks fixed circular, size 3
Started: March 3, 2010
Finished: March 5, 2010
Ravel It!
I knit this dishcloth for Stephanie Pearl-McPhee, the Yarn Harlot. I gave it to her when she spoke in Detroit this past Saturday.
This is actually the second Kris Knits cloth pattern I have knit, I'll post the first one in a day or so. Kris' patterns are very well written and totally easy to follow. This cloth only took me three days to knit, but I could probably knock one out in a couple hours if I needed to. The only thing holding me back was that knitting with cotton puts a lot more stress on my wrists and forearms than wool does; it's simply not stretchy. I recycled the yarn from an Everlasting Bag Stopper I had left unfinished since last summer. We've received enough reusable grocery bags lately that I really have no need for a knitted one. Yay for stashbusting! I don't know if it was because the yarn had been previously knitted or because of the color of dye, but the green yarn was relatively soft and easier on my hands with this cloth. I'm knitting another cloth pattern in hot pink (yuck) and the yarn is a lot stiffer. I know red dyes can affect how yarn acts, so maybe that's it.
I really love the four different shamrock designs (five if you knit the smaller cloth) Kris came up with. I tried years ago to design a shamrock pattern for a pair of socks and came up empty. After knitting this pattern, I realize that garter stitch patterns work much better than all reverse stockinette patterns. I'll definitely look to incorporate these shamrocks into a pair of socks for St. Patty's Day next year.
Thursday, February 18, 2010
FO: Pembroke Vest

Pattern: Pembroke Vest
Source: Petite Purls, Issue 1 Summer 2009
Yarn: Stonehedge Fiber Mill Shephard's Wool - Lime
Needle: Knit Picks Options, size 6 & 8
Started: September 16, 2009
Finished: late September 2009
Ravel It!
Although published through an online magazine, this is another Through the Loops design I fell in love with. When I originally bought this yarn, I had no idea what it would become. I just picked it up because it was local, totally soft and a nice color. With nothing on the needles this fall, I came across this adorable little vest in my Ravelry queue and knew I had found the perfect match. I started knitting the vest on a trip up north to go camping in September. It was relaxing and gratifying to knit outside by the campfire. Luckily nothing ended up smelling to strongly of smoke.
The pattern is written for several different sizes, I knit the 12 month old size because I figured that was how much yarn I had. I ended up with only a few grams left over. The smaller sizes have a buttoned shoulder for easier dressing of the little ones. Now I just need to find a little one to fit inside!
The yarn is very soft, and not washable, so I don't know how well it will hold up to kiddo wear and tear. I couldn't resist though. It was the perfect pattern to use up a wonderful yarn.
Monday, January 18, 2010
FO: Flat 'at

Pattern: Morgan
Source: Knitty.com - Fall 2008
Yarn: Rowan Felted Tweed
Needle: Knit Picks Options, size 6
Started: November 29, 2009
Finished: March 28, 2009
Mods: Sewed brim to front of hat, free-handed brim stiffener.
Ravel It!
Here in lies the problem with blogging knits so long after you finish them. I can't remember how I came to knit this one! I'm sure I saw it in Knitty that fall when, like everyone else, I crashed the site the day it came out. I do remember having stealing a similar hat from my Dad when I was young, so I'm pretty sure that's why I wanted to knit this one. I'm not entirely happy with how it turned out, though I don't hate it either. I had worn it a couple times. For me, the Felted Tweed makes the hat too light; like it doesn't have enough substance. The hat doesn't want to keep its shape, instead it conforms to the shape of my head. I also wasn't too pleased with how the brim template fit into the actual knitting. Perhaps my gauge affected things, but I ended up free-handing the layout with some cardboard. The main complaint I've read about this pattern is the fact that you have to pay constant attention to the written pattern because the increases are spread randomly throughout the crown to better disguise them. I can't say it really bothered me, although I do remember having to constantly count the number of stitches on my needles.
I'd like to knit another one of these with more substantial yarn - and something not so warm - so I can have a summer version. This one is more suitable for fall. I did pick up some Cotton Ease for it, but couldn't get gauge. I've also got the idea in my head on how to design my own version. It would be constructed differently and I think it would be better. Also, I want to put cables on the top of the hat. I don't know when I'll get around to that.
Sunday, January 10, 2010
FO: Mini Hockey Sweaters

Pattern: the beer sweater
Yarn: Knit Picks Palette
Needle: 2.0 mm bamboo needles
Started: late June 2009
Finished: July 14, 2009
Ravel It!
I knit this Vancouver Canucks sweater for our first off-season swap in the Puck This! group on Ravelry. The sweater has 4 row hem at the bottom to keep it from curling up. The sleeve and body stripes are all duplicate knit, which added more bulk than I anticipated. Normally it probably wouldn't be an issue, but on a sweater this small, it shows a little. I decreased sharply at the neck to keep it from curling and to make it more like a real sweater. Therefore, it will not actually fit on a beer bottle.
The logo is needle felted using Knit Picks Palette yarn. I outlined the green oval twice to give it more thickness. This was my first time needle felting and I learned that white can be tricky to use. The felting needle tends to pick up fibers from the surrounding space - in this case blue - and they can muddle the white color. Also, I think the white yarn I was using was a bit thinner than the green.
Pattern: the beer sweater
Yarn: Knit Picks Palette
Needle: 2.5mm bamboo needles
Started: August 23, 2009
Finished: September 3 2009
Ravel It!
The Boston Bruins sweater was also knit for a Puck This! swap, the second round during the off-season. Using what I learned from knitting the Canucks sweater, I went up a needle size and added a few stitches to the body and sleeves. I also knit the yellow stripes on the sleeves and body, and then duplicate stitched the small white and black accent stripes over top of the yellow. This worked better to reduce the bulk of the stripes.
The original pattern has you put stitches on hold where the body and sleeves meet and graft them together when finished knitting. Since these aren't meant to be worn and that method left some bulk under the arms, I omitted those stitches. The yoke of the Bruins sweater was different than the Canucks sweater as well. I switched to yellow for the last 5 rows and continued to decrease until the neck opening was small enough. I then came back and duplicate stitched the black yoke accents.
Again the logo was needle felted and I'm proud to say that I did the entire logo at lunch one day sitting in my car. It was tricky to free hand the circle and B, but very rewarding once I got it right. With this sweater, I also doubled the yarn (essentially) to bulk up the lines of the logo.
I'm really please with how these turned out. I even received a Detroit Red Wings jersey of my own in the swap!
Tuesday, December 29, 2009
FO: Mother-In-Law Scarf

Pattern: Van Ness Scarf
Yarn: Patons Classic Wool Merino
Hook: Boye 5.5 mm (I)
Started: December 2, 2009
Finished: December 6, 2009
Ravel It!
This blog may be named Knits With Balls, but lest we forget, I began my fibery career with crochet oh so long ago.
My MIL asked me for a scarf, oh about a year go now, and I finally got around to making it. She wasn't guilting me about it, but I felt guilty nonetheless. Especially since it was only one in the list of items I'm to make for her and others. I started to knit a broken rib pattern, but ran into three problems. 1) The two skeins of yarn I had were different dye lots, so I was alternating yarn every two rows which made it fiddly. 2) Knitting it was taking FOREVER. 3) It was REALLY BORING. Solution: Crochet.
I searched Ravelry for crocheted scarf patterns and found what turned out to be the perfect pattern. The Van Ness Scarf was a bit fiddly to start (you begin in the middle of the scarf with four individually knitted crocheted medallions) but once I got going, it flew off the needles hook. I decided not to worry about the differing dye lots and knit each half with a separate skein. You can tell the difference if you look really closely, but she'll never know.
After much consternation regarding whether or not to gift it for Christmas - my wife, SIL and I usually give her gifts from all three of us, so an individual gift was outside the norm - I decided to last minute and I was glad I did. The holidays are crazy and stressful enough and - not to brag - I'm pretty sure I made her day. Her and her sister gushed over it, which still amazes me. I don't know if I'm humble or just cynical, but knowing what goes into making certain items - in this case, a mere 4 days of work - it surprises me when people react that way. Surprise or no though, it's still nice to have your work appreciated.
Monday, August 24, 2009
FO: Orange Pooled Socks
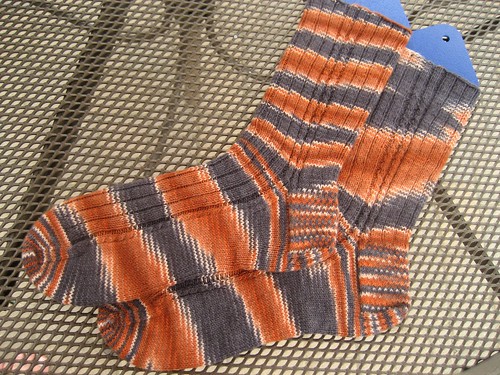
Pattern: my own
Yarn: handgefaerbt.com Merino Extra Fine in Little Zentaur
Needles: Knit Picks Options, size 1
Started: May 6, 2009
Finished: August 19, 2009
Ravel It!
Whew! Finally a finished project. I haven't had one of those since... **rifles through the archives** ...Well, I haven't had one of those blogged since... late April! At last count I have four (4!) unblogged finished projects. The addition of some sock blockers should alleviate that congestion.
The Socks
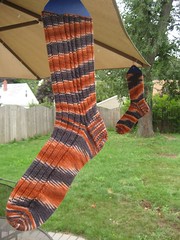
I started this pair of socks way back in May before I went on vacation to Florida. My plan was to knit (mostly) on them while I was away and blog/tweet about it. The pattern I chose was Mad Color Weave, and I actually did manage to knit quite a bit on them while I was away. All the rain in Florida while we were there helped. It wasn't until the last few days of vacation that I tried them on to find I couldn't get them past my heel. The pattern just didn't have enough stretch.
Disheartened, I packed the socks away and knit on another pair the rest of the way and on the flight home. It wasn't until that project stalled that I picked these back up. I didn't have the heart to completely frog the sock, so I left the cuff and restarted in my own pattern. I continued the 3x1 ribbing down the front and back and expanded the two stitch cables at the sides to every four rows instead of every two. Other than that, they're regular cuff-down, heel-flap socks.
The Yarn
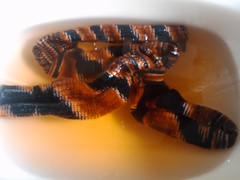
I ordered this yarn for my birthday last year and finished the socks nearly a year later. I love the colors and the way they pooled on these socks. One thing that bugs me about yarn dyed like this is the white spaces between the color changes. But the way these knit up, the white does not distract. I also have a feeling the two socks would have matched if not for most of the first cuff being knit with frogged yarn.
My fingers turned orange whenever I knit on these, and they put off quite a bit of dye when I washed them. The yarn was super soft to work with and the twist was interesting. I don't know enough about yarn to explain it, but it wasn't your typical sock yarn. I'm not sure how well it holds up as I have not yet worn these socks and I won't until the fall. I reserve my knit socks for wear with jeans in the cold months. I'm not one that can pull off fancy colored socks and sandals.
Final Verdict
My only disappointment with these socks is that I didn't use as much yarn as I could have. One of the drawbacks of knitting from the top down. I tried to employ my digital scale and guess at how much yarn each part (leg, heel, foot) would weigh, but I ended up with 48 grams of yarn left over.
Otherwise I love these socks. I love the color orange and try to incorporate it as much as I can within reason. These will be perfect peeking out from the bottom of jeans this fall. I also love the fit as I guessed correctly on foot length. These will not be bunching up at the heel. All-in-all a solid pair of socks.
Thursday, April 23, 2009
I'm a Fan of the Environment

Pattern: Swiffer Re-Usable Cloth
Author: Birdy Evans
Source: Birdy's Knits
Yarn: Lily Sugar'n Cream Ombres & Prints
Needles: Knit Picks Options, size 7
Started: April 10, 2009
Finished: April 11, 2009
Modifications: none
Ravel It!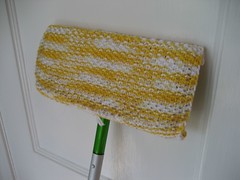 We go through a lot of Swiffer cloths in our house. In fact, my mother-in-law dropped off a giant box of them from Costco a few weeks ago. I finally decided that we needed a better solution.
I landed on this pattern because it was a) free, b) used needle sizes I had and c) is reversible. You can't see it in the pictures, but there are bobbles that you poke into the retaining tabs on the sweeper to hold it in place. You only need to push the bobble through to the other side and turn the whole piece inside out.
I gave it a quick push around (that's why it looks dirty in the photo - it is!) and it seemed to pick up the dust and dog hair nicely. I plan to knit several more of these and hopefully it can cut down on our waste.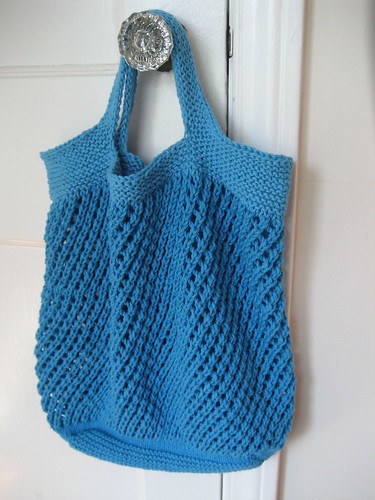
Pattern: Everlasting Bag Stopper
Author: Amy R Singer
Source: knitty.com
Yarn: Lily Sugar'n Cream Solid
Needles: Knit Picks Options, size 5 & 10.5
Started: April 11, 2009
Finished: April 18, 2009
Modifications: knitted handle, left off toggle
Ravel It!
Another shot at helping the environment, this bag took about a week to make. We already choose paper bags at the store whenever possible since they can be recycled and reused, but they also take up space in the kitchen and I hate putting them away. I thought a fun, totally reusable bag would make shopping more fun and environmentally friendly.
I originally thought two skeins would be enough, but as I knit I realized it would be way smaller than I wanted if I only used that much. I picked up a third skein at the store, but soon saw my mistake. The new yarn was a different dye lot and the difference was quite noticeable. I wanted to use as much of the three skeins as possible, but the dye lot difference meant a transition in the middle of the bag would not be pretty. So, I knit as far as I could on two skeins, then switched to the third for the garter top and handles. If you look closely at the photo, you can see the difference.
For the top and handles I knit 8 rounds (4 ridges) then bound off 20 stitches centered on either side. On the next round I cast on 35 stitches and reattached on the other side. I knit another 8 rounds or so and bound off loosely. The extra stitches cast on for the handles make them a little longer and easier to hold. Next time I may bind off more stitches to move the 'ends' of the handles closer to the short sides of the bag. That should also allow it to fit over a shoulder.
Unfortunately my first attempt to use my new shopping bag was met with resistance. I tried to use the self check out station at the grocery store and my approximately 180 gram cotton bag threw the scale off. It kept asking me to remove my last item and scan it again. To add insult to injury, I had to use plastic bags for that shopping trip since they don't supply paper at the self check stations.
These knits were my first foray into knitting with cotton yarn and it wasn't bad. I've read a lot of comments saying it hurt people's hands or wrists. My wrists did end up hurting after knitting the bag, but I don't know if that was from the cotton yarn or because I was doing a lot of knitting.
Monday, January 12, 2009
FOs: 5-Hole Pocket Hat & One Good Turn Deserves Another
Hat Trick complete!
Pattern: 8-trick pocket hat
Author: TECHknitter
Source: TECHknitting
Yarn: Cascade 220 in burnt orange, marine, yellow, charcoal and red
Needles: Knit Picks Options, size 5 & 6
Started: January 2, 2009
Finished: January 7, 2009
Modifications: none
Ravel It!
I've been wanting to make this hat since seeing it on TECHknitter's blog last February. I knew I had enough Cascade 220 to make it work, I just needed the motivation of the January Hat Trick to get started. I was pretty surprised with how little of each color I used. The yarn was leftover from various projects and I still have enough for at least one, maybe two more hats. I knit the brim on size 6 needles, but decided to switch to size 5 for a bit tighter gauge for the body of the hat. I'm glad I did. The hat hugs my head nicely, not too tight and not too loose. The only part of the fit I don't like is the top. It really needs to be ripped out and made shorter for two reasons. One, with the brim positioned just below my ears, the top sticks up and looks goofy. I prefer a hat to fit snugly on the top of my head and to do so now bunches the hat in back. Two, the extra room up top allows the hat to shift around while I'm wearing it. We got 6+ inches of snow this weekend and I wore the hat while shoveling. I had to continually re-adjust the hat to keep it out of my eyes. Luckily, the pattern accounts for size adjustments all in the last 'stripe' at the top of the hat, so I won't have to redo the whole thing.
Pattern: Turn a Square
Author: Jared Flood
Source: b r o o k l y n t w e e d
Yarn: Knit Picks Wool of the Andes in black & Noro Silk Garden in 252
Needles: Knit Picks Options, size 7
Started: January 10, 2009
Finished: January 11, 2009
Modifications: knit two stitches between crown decreases
Ravel It!
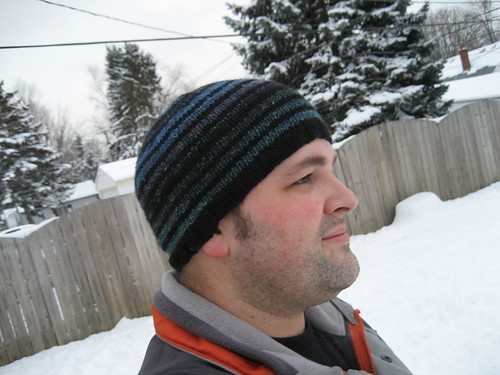
To complete the hat trick, I took the easy way out.* My first Turn a Square went so quickly, I knew I could whip out another easily. I happened across some leftover Wool of the Andes in my stash this weekend and - after seeing how little yarn my first TaS took - thought it would be enough to make another hat. To better ensure I wouldn't run out though, I switched things up and knitted only 2 rounds in the main color and 3 rounds in the contrast color. I was right to do so, I only had a few yards of the black yarn left when finished. 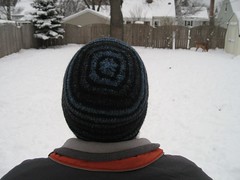 I had a bit of difficulty with the decreases on my first attempt at this pattern, so I decided to try something different. I knit two stitches between the decreases to try and eliminate the gaps that formed the first time. I'd say it was a success, but had one unexpected side effect. The normal raglan decreases form the titular square on top of the hat. Putting extra stitches between these in effect rounded the corners of that square. If I were to knit this pattern again - and I think I have just enough Silk Garden to do it - I would move the decreases so they lay in the middle of a needle rather than at the end to better close up the gaps.
All in all, the January Hat Trick was (and still is!) a lot of fun. I've really enjoyed seeing everyone else's hats and getting to know members of the Puck This! group on Ravelry better. Thanks to Lolly and Mesange for putting this together. I look forward to more great KALs with this group.
Finally, I leave you with an outtake from this weekend's hat photo session:

She was so fired up, she wouldn't sit still for a photo
*I've since cast on for the Aran Swatch Cap I originally queued to complete my hat trick. I fully intend to finish with 4 goals this month.
Friday, January 2, 2009
FO: Mom's Mitered Mittens
Pattern: Mitered Mittens (May)
Author: Elizabeth Zimmerman
Source: Knitter's Almanac
Yarn: Valley Yarns Sheffield
Needles: Knit Picks Options, size 7
Started: December 2, 2008
Finished: December 9, 2008
Modifications: Same as last time
Ravel It!
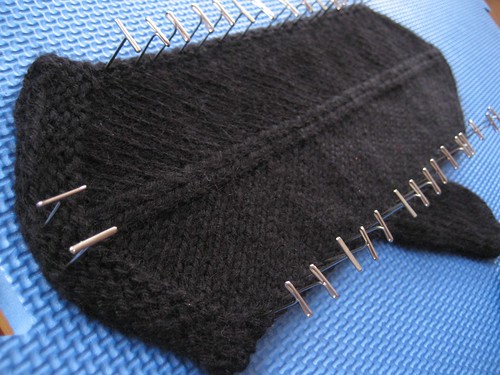
My Mom requested a pair of these after seeing my own pair knit with Noro Silk Garden, so I decided to make them part of her Christmas present. She wanted them in all black, but as you all know, Noro doesn't come in solid colors. In searching for a replacement, I took the opportunity to try something new.
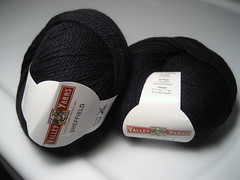 I wanted a yarn with a high silk content, but also some wool for warmth. I settled on Sheffield by Vallen Yarns from WEBS. It was the worsted weight yarn with the highest silk content they offered, although it wasn't until I placed the order that I realized that NSG is mostly silk with some wool and mohair. Sheffield is essentially a merino yarn with some silk and angora. Dissimilarity to NSG aside, it's a really nice yarn. I don't know that I'd make a sweater out of it because of the angora (too fuzzy for me) but it would definitely be luxurious.
The finished mittens turned out really well. They'll be nice and warm and they look sophisticated enough to be work with a dressier coat. Mom liked them and put them on immediately after opening the box. Unfortunately, I don't have any photos other than the blocking photos. With them being all black, I didn't want to move them around much so they would stay nice and clean.
Wednesday, December 3, 2008
FO: Matrix Mittens
Pattern: Matrix
Author: Kerry Palm
Source: Knitty, Winter '07
Yarn: Cascade 220 in Burnt Orange (7824) and Charcoal (8400)
Needles: ChiaoGoo bamboo DPNs size 5 & 6
Started: February 11, 2008
Finished: November 28, 2008
Photographed: November 30, 2008
Modifications: Added a pattern repeat to both sides to fit my man hands, used a tubular cast on, changed cuff to 2x2 ribbing instead of corrugated ribbing, changed thumb gusset pattern to vertical stripes.
Ravel It!
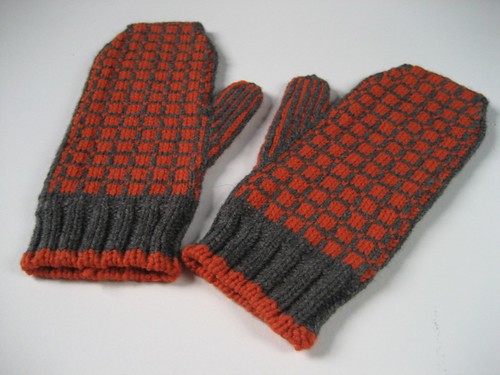
Finally finished these. I started them last winter because I couldn't take using the fingerless gloves I had at the time. I had one mitten finished, but bogged down when I realized the cuff needed to be re-worked. I followed the pattern as written, but the corrugated ribbing didn't pull in enough to suit me. Faced with the prospect of redoing the cuff, I gave up and they languished over the summer.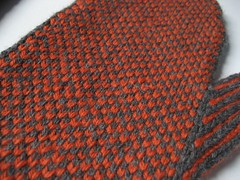 It took the onslaught of cold weather for me to pick them back up. I devised a plan to replace the cuff and powered through. Using a tubular cast on, I knit a replacement cuff, removed the offending piece and grafted the new part on. It was surprisingly easy and gave me the needed motivation to finish the pair. The first mitt took me 8 months to finish, the second only a week. Why do I wait so long?!
I was keenly aware of color dominance as I knit these up after discovering it on Grumperina's blog. The only problem was in the long layoff between mitts, I had forgotten which color went where. I knew I wanted the gray to be dominant, but I couldn't remember how to hold the yarns to accomplish that. Instead of looking it up, I stubbornly knit an inch or two into the pattern before realizing I was doing it wrong. You can really see it on the thumb pattern where the gray lines of stitches literally sit higher than the orange lines.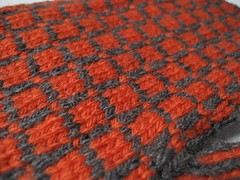 Speaking of the thumb, I made two modifications here. The pattern originally called for horizontal stripes on the thumb, which left either long floats while you knit with only one color or catching the yarn several times and you knit around. I wasn't a fan of either - and I like Elli's Herringbone Mittens - so it was an easy switch. I also made the gusset larger to suit my man hands. The only other modification I made was to add a pattern repeat to both side to better fit my hands.
Final verdict: Excellent. They keep the cold out and warm my hands up nicely. The only thing I don't like has more to do with my winter coat than the mittens. The cuffs don't play well with my coat because it has such tight cuffs. Putting them inside my coat sleeves makes for a good seal against the winter wind, but they're a bitch to get off. Outside my coat cuffs, they get stretched out and don't sit right on my hands. I need a new coat.
Saturday, September 27, 2008
FO: Zeebee
Author: Schmeebot
Yarn: Knit Picks Shamrock in Doyle
Needles: Knit Picks Options, size 8
Started: September 6, 2008
Finished: September 8, 2008
Photographed: September 9, 2008
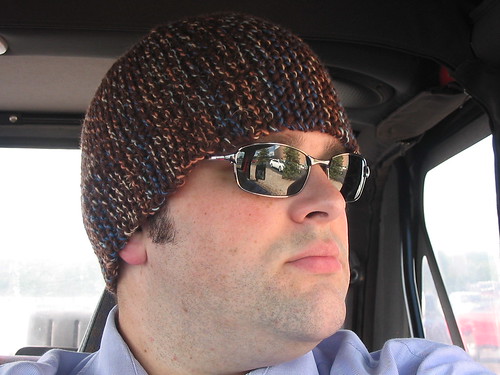
Modifications: I modified the instructions to repeat steps 6-14, also to finish with 22, then 20 rows and repeat
Ravel It!
Another reaffirmation of my love for garter stitch, I even love the raw knitted edge rather than a nice, smooth, slipped stitch edge.
The pattern
The instructions have you knit 8 total sections around the circumference of the hat using short rows to shape the crown. The first wedge has progressively shorter rows with the second section working back up towards the crown with increasingly longer rows. I flipped every second section around and just knitted straight back to the crown after completing the first wedge. I felt it gave a rounder shape to the crown. Oh yeah, by the way, I figured that out because I knit this beanie twice. The first time was too big all around, the second attempt fits perfectly. I guess that shows I can learn from my mistakes.
In order to end up with a completely seamless beanie, the pattern starts with a provisional crochet cast on. Never worked one of those before, but no problem there. The other half of seamless hat equation then, would be garter stitch kitchener. Whaaaa?! Of course, I hit the internet and was relieved to find this wonderful tutorial (PDF). Looks easy right? Right. The pattern instructions hold your hand with explicit instructions on how to orient the stitches on your needles to avoid a telltale indent at the brim edge. I don't know how, but I beefed it. Oh well, at least the rest of the seam turned out right.
 The yarn
The was the third time I've used Shamrock. I know from the scarf I have that it's warm enough, but I also know from the neck warmer I made that it gives off a lot of fuzz. What I found out this time around was the colors in Doyle are kinda weird. Light blue and brown together, it's become increasingly popular in recent years. Brown and white, sure why not? A simple combination. Even orange and brown works for me, they're both warm colors and the orange is not shockingly bright. But all in the same yarn? It's almost one color too many. I say almost because I'm just weird enough to wear it anyway :)
Monday, September 22, 2008
FO: Noro Mitered Mittens

Pattern: Mitered Mittens
Author: Elizabeth Zimmerman
Source: Knitter's Almanac
Yarn: Noro Silk Garden
Needles: Knit Picks Options, size 7
Started: September 8, 2008
Finished: September 17, 2008
Photographed: September 17, 2008
Modifications: Thumb Gusset by Grace Ivy, garter edge instead of ribbing
Ravel It!
Love these. My hands will definitely be warm this winter. This is the second pattern I've knit from Elizabeth Zimmerman's Knitter's Almanac and it's just as inspired as the February Baby Sweater. I swear, EZ never ceases to amaze me. I did add the thumb gusset rather than the afterthought thumb. I've knit mittens like that before and my hands just aren't built that way; The palm fabric ends up pulling like crazy.
I knit these both at the same time using magic loop - after the initial cast on. It saved me from having to count rows of the first mitten to make the second one match. I also knit the garter cuff in the round: knit to the end of the row, slip the next stitch, wrap it, return it to the left needle, turn and knit. Finally, for aesthetic reasons, I placed the thumb gusset opposite the 'seam' created by wrapping stitches in the garter cuff. That places the seam on the outside of my wrist, so even if it was a little wonky, I wouldn't have to see it.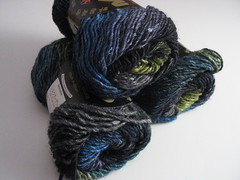 This was my first experience with Noro Silk Garden (killer price at divaknitting.com by the way) and I came away impressed. It was soft and buttery as I was knitting with it and bloomed nicely after a good soak. I haven't worn the mittens yet, so I can't say how well the yarn will hold up. There was some vegetable matter - which I hear is the thing to expect with Noro - but I wasn't bothered a bit by it. To me, it added an extra bit of interest to the knitting process. I did find a knot in one of the skeins, but it happened to be in the portion I didn't use. I used almost a full skein per mitten and the cuff starts about three inches before my wrist.
The only thing that bothered me about the yarn was the colorway. Most of the mitered mittens knit with this yarn look different for sure, but still related since more than one of the colors usually show in both mittens. In mine, the connective colors are the black and gray, so it's not quite as obvious. But, that's more my fault than anything, I should have rewound the skeins first and chose the two that coordinated best.
The photo of the yarn also marks the first and last time I got to use my DIY light box. I used a rather large box that our patio chairs came in, figuring I could use it for larger items like sweaters. Unfortunately, that meant it was stored on the floor of the basement. After last week's heavy rains from hurricane Ike, our basement flooded and the cardboard was soaked. Oh well. It was kind of a pain to make since it was so big and this gives me the opportunity to make another.
Sunday, August 24, 2008
Finished
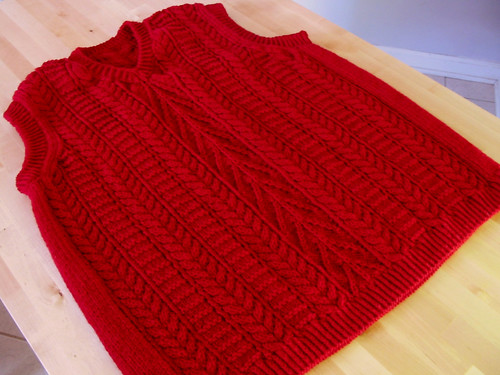
Snip, snap, snout, this tale's told out.*
More on this (much) later. I'm off to ice my arms and recoup some sleep.
*A gold star to anyone who knows what that's from.
Subscribe to:
Posts (Atom)